A slightly unusual hike which makes you tuned for the summer.
While many of us already took the Nakerala Pass between Tkibuli and Nikortsminda by car to enter Lechkhumi and Racha, only a small number probably crossed this ridge by foot and enjoyed the Shaori Reservoir in all its magnificence. Continuing to Mount Satsalike (1.999m) does not only allow a great panorama on the well-known parts of the Greater Caucasus but also gives impressions on the for most of us inaccessible South Ossetian part. A crazy art hut, a swinging stone, and swimming in a rather hidden mountain lake are a nice add-on which round up this slightly unusual hike.
Hiking the entire route from Mukhura via Shaori Reservoir and Mount Satsalike to Khreiti will require 2,5 to three days. Anyhow, if you are short in time and/or no big fan of forest (see later trail description), you may only hike to the Shaori Reservoir or start just right there to shorten the trip to two days.
Though the Mukhura-Shaori part is not very demanding physically, the nature of the trail will require some mental strength and stamina towards the end which makes it moderate. The marked way up to Mount Satsalike as well as the unmarked path down to Khreiti are easy to walk and enjoyable for the mind.
Neither the Nakerala Ridge (up to 1.800) nor the Satsalike Ridge (up to 1.999m) are too high, which makes it a good pre- or post-season hike. Nevertheless, be aware that the way down from Nakerala to Shaori Reservoir is through dense forest with northern exposure which leaves the snow mostly untouched until mid or even end of May. Also, Shaori itself has a colder microclimate throughout winter and spring due to its embedding in mountain ridges on all sides. The area around Mount Satsalike is in contrast mainly opposed to the sun with little to no trees.
In general, both directions are possible. With bigger towns at both ends (Tkibuli and Nikortsminda; Chiatura and Sachkhere), it is more a question of your actual location, and the travel means at hand. Anyhow, in case you want to hike between Mukhura and Shaori Reservoir, it is highly advisable to start in Mukhura as it is definitely easier to navigate through a forest without proper marking when going down than when going up (see details later in the description).
Wherever you start or end, you may also consider to include a visit to Chiatura (the city of cable cars; the name may derive from ‘ჭია/chia’, which is Georgian for worm, due to the form of the streets and tunnels into the mountains) or to the close-by Katskhi Pillar (small church on a 40m high pillar). Possible hiking alternatives to/from there will be described below as well.
Water is widely available from Mukhura to Shaori Reservoir, at the reservoir itself (cooking and/or filtering advisable), and on the southern ascent of the Satsalike Ridge, especially when getting closer to Khreiti. Unfortunately, there is no water source on the way up from Shaori to Mt. Satsalike nor on the ridge itself; snow leftovers may be a backup if needed.
Camping is basically possible all around the Shaori Reservoir and on the Satsalike Ridge due to its green endlessness; hence, you can pick based on your progress and water situation. There is also an officially marked (though not the best) camping spot on the top of Nakerala Ridge and various huts along the way, which can serve as emergency shelters. Among them is the "Satsalike Art Hut" (named by the author); though it will probably be too early on your journey for a stay over, this somehow abandoned, somehow popular place is definitely worth a visit and a small break.
To get to the village of Mukhura, you first head to Tkibuli; from Kutaisi, the minibus is running regularly (8:00; 11:00; 13:00; 14:00; 15:00; 16:00; 16:40; 17:00; 17:50) from Station Square (not the main bus station at McDonalds!), costs 5 GEL and needs a bit less than an hour. From there you can take a taxi for the remaining 13km (about 30 minutes), which should cost 25-30 GEL. To avoid being overpriced, walk some meters away from the train station in Tkibuli and ask a driver further down the road. There are also local minibuses to Mukhura running from a bus stop close to the train station, but the departure times given to us were rather vague ("maybe every two hours").
In case you want to hitchhike the last bit, ask the Kutaisi marshrutka driver to drop you off before the city centre, at a bridge crossing the Tkibula River. Whichever way you get there, the way up to Mukhura will unveil spectacular views on the Nakerala Pass and the Nine Crosses shrine.
In case you want to skip the first day and start right at the Shaori Reservoir, from Kutaisi, there was one bus a day leaving from the bus station by the chain bridge below Bagrati cathedral (not the Central bus station by the McDonalds). It departs around 14:00. Another bus departs towards Racha around 9 am from the same location, but it takes the upper route, through Alpana, bypassing Shaori reservoir. Still, you can take it and get off at Ambrolauri, mere 5 km from the trailhead.
The recording of this hike ends in the centre of Khreiti on the asphalted road to Chiatura. As people frequently travel in this direction for all kinds of business, hitchhiking is possible for sure. A (pre-ordered) taxi from Chiatura might be an option as well. On foot, you may try to follow the smaller streets through the villages towards Katskhi and the Chiatura-Zestaponi street (ca. 12km) or even back to Mukhura (ca. 15km). Khreiti-Chiatura is not recommendable for hiking as you have to follow the asphalted street; alternative paths before will be described further down.
From Chiatura (probably at the Soviet Monument on the city border), you can catch one of the regular marshrutka to Zestaponi, wait for the Sachkhere-Kutaisi train which runs twice a day, or simply put your thumb up – you should be able to get a ride soon on this frequently used street.
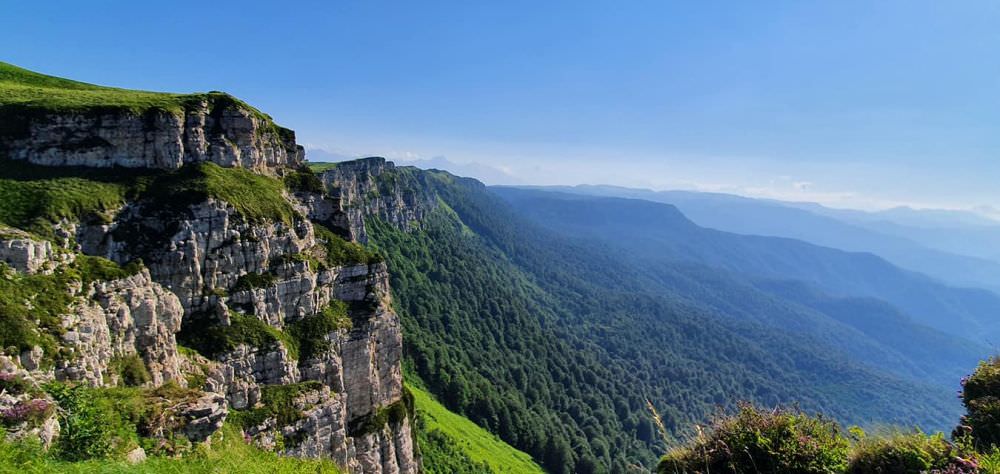
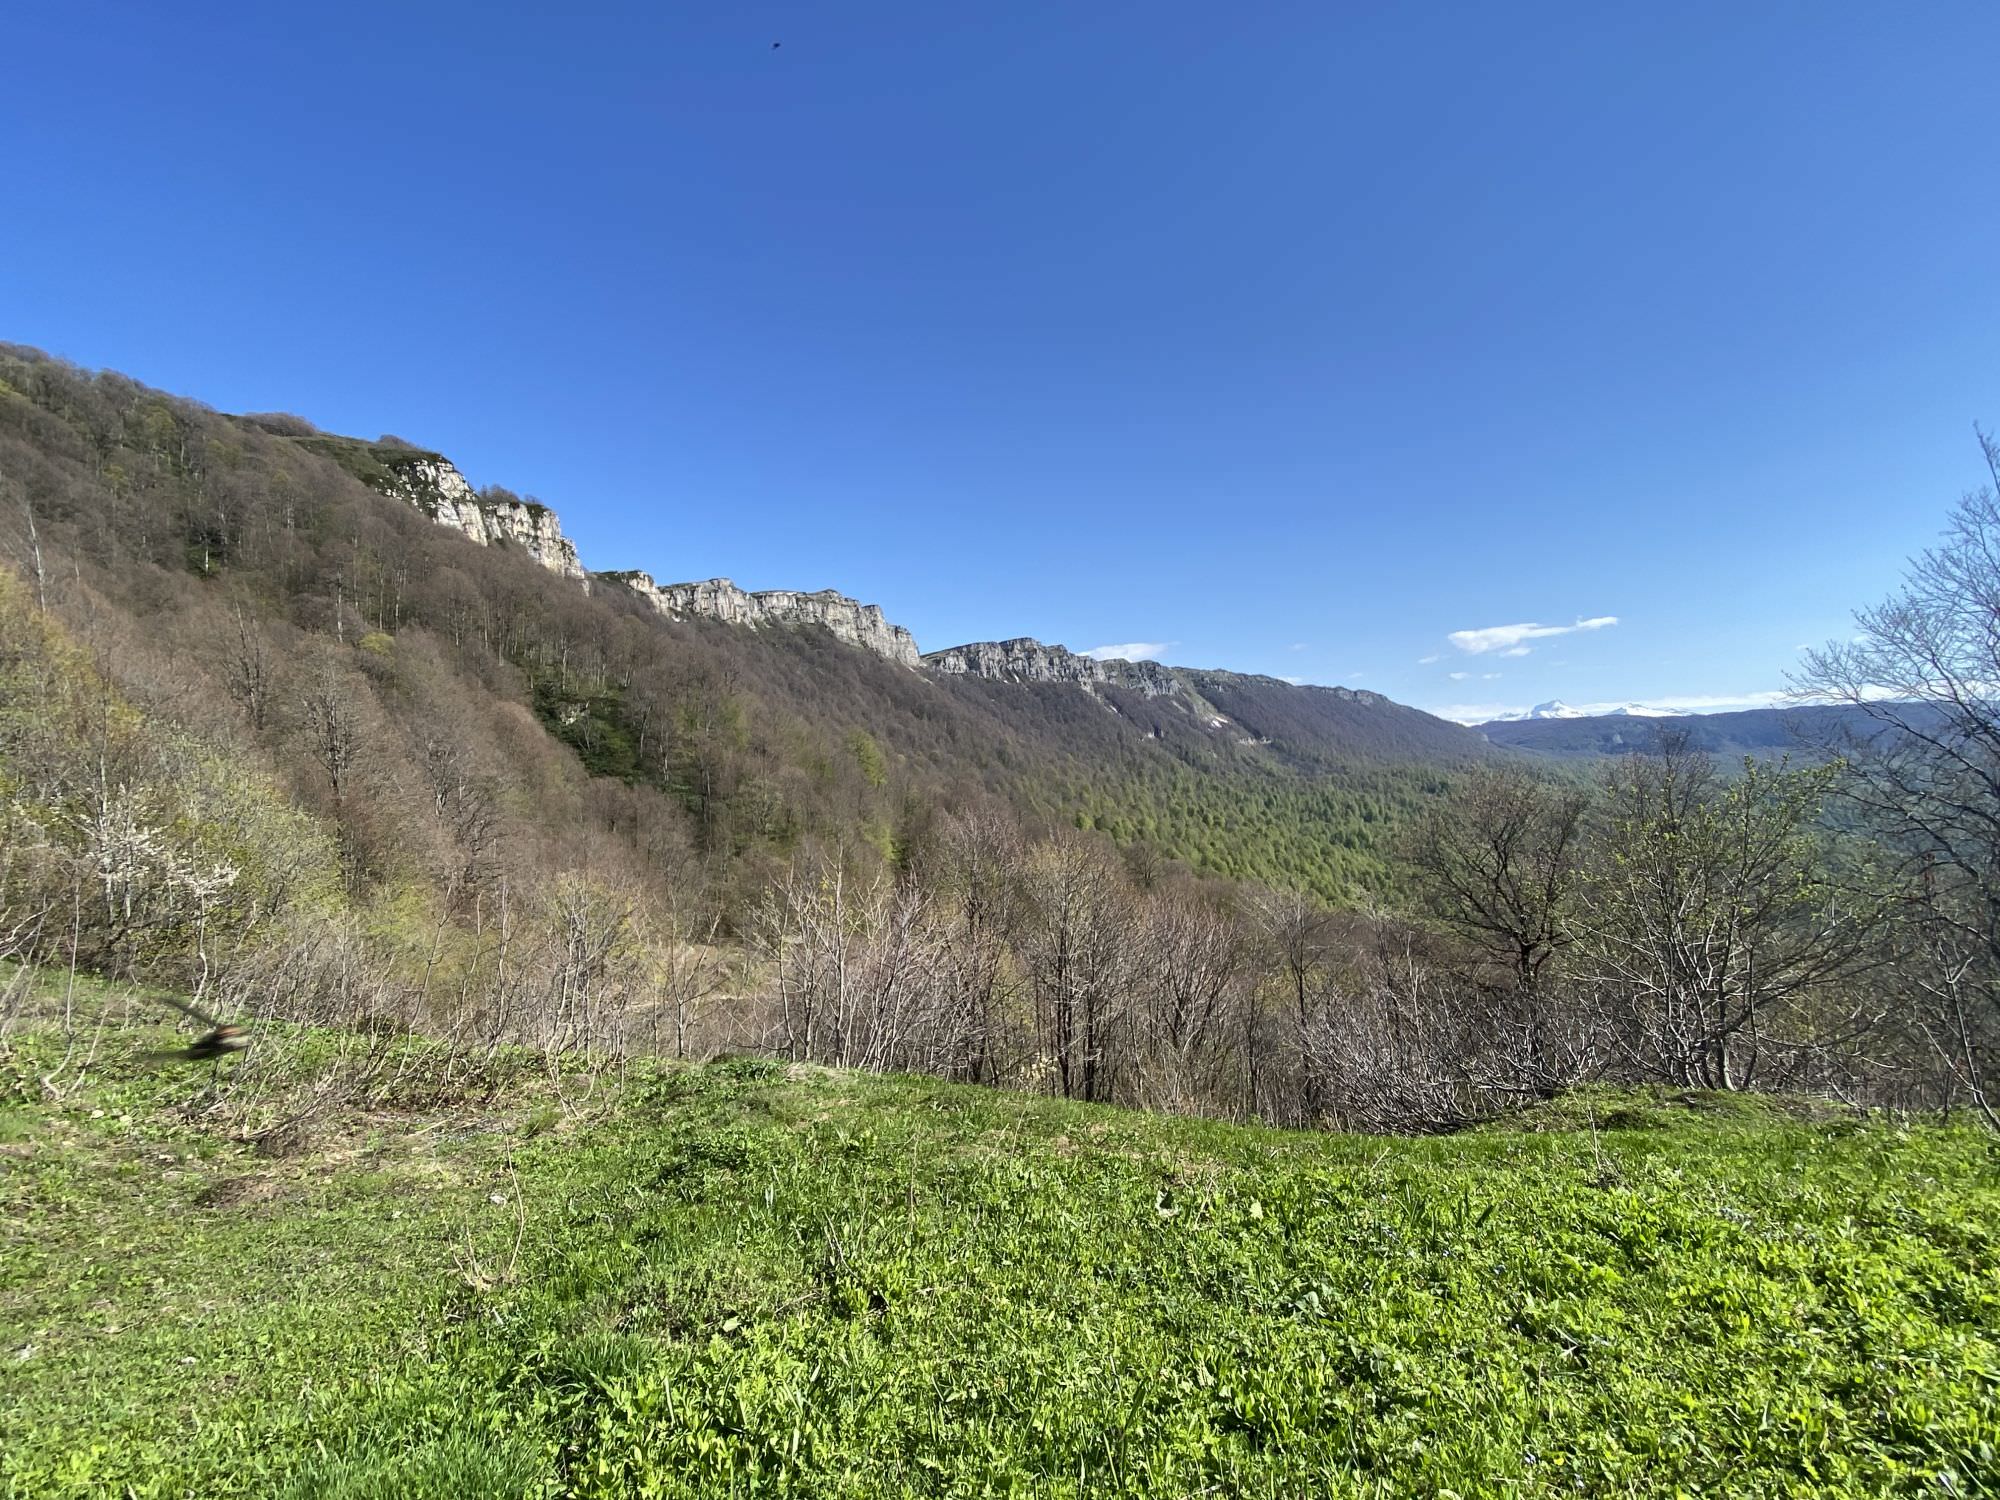
Cliffs of Mt. Satsalike
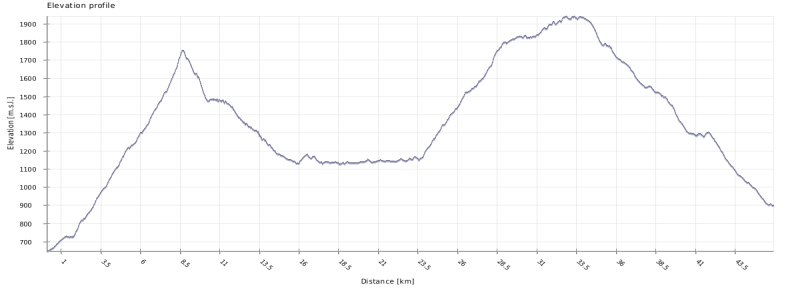
| Distance | 45.5 km |
| Trail type: | AB trip |
| Max. elevation: | 1942m |
| Min. elevation: | 644m |
| Total climb: | 2314m |
| Total descent: | 2044m |
Some hundred meters after the Mukhura Public School, a big modern building where you could also leave your car in case of return, an information board with a short trail description marks the beginning of the trail. From there you follow the white-red-white signs along some fences on a rather newly asphalted street through a wide, open area; use the chance to get some first nice sights.
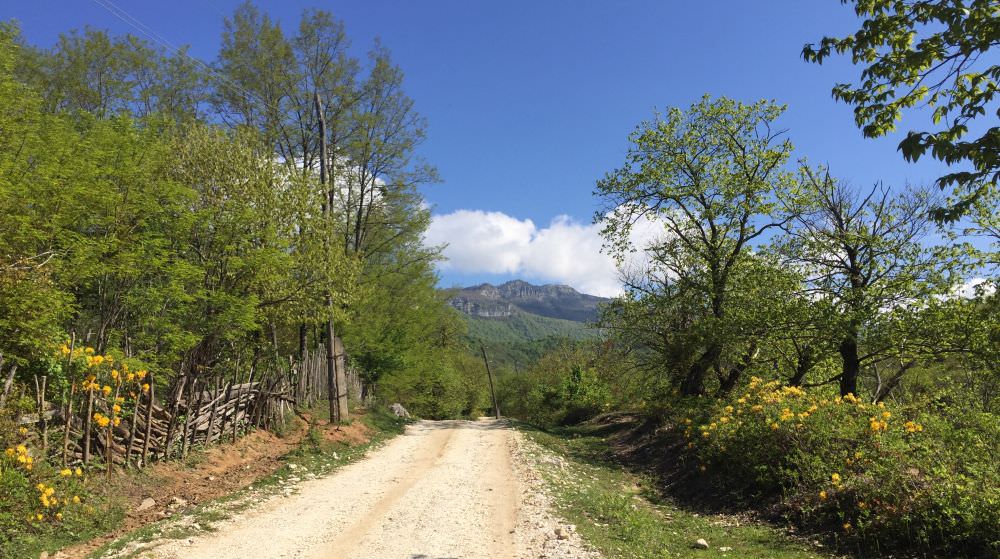
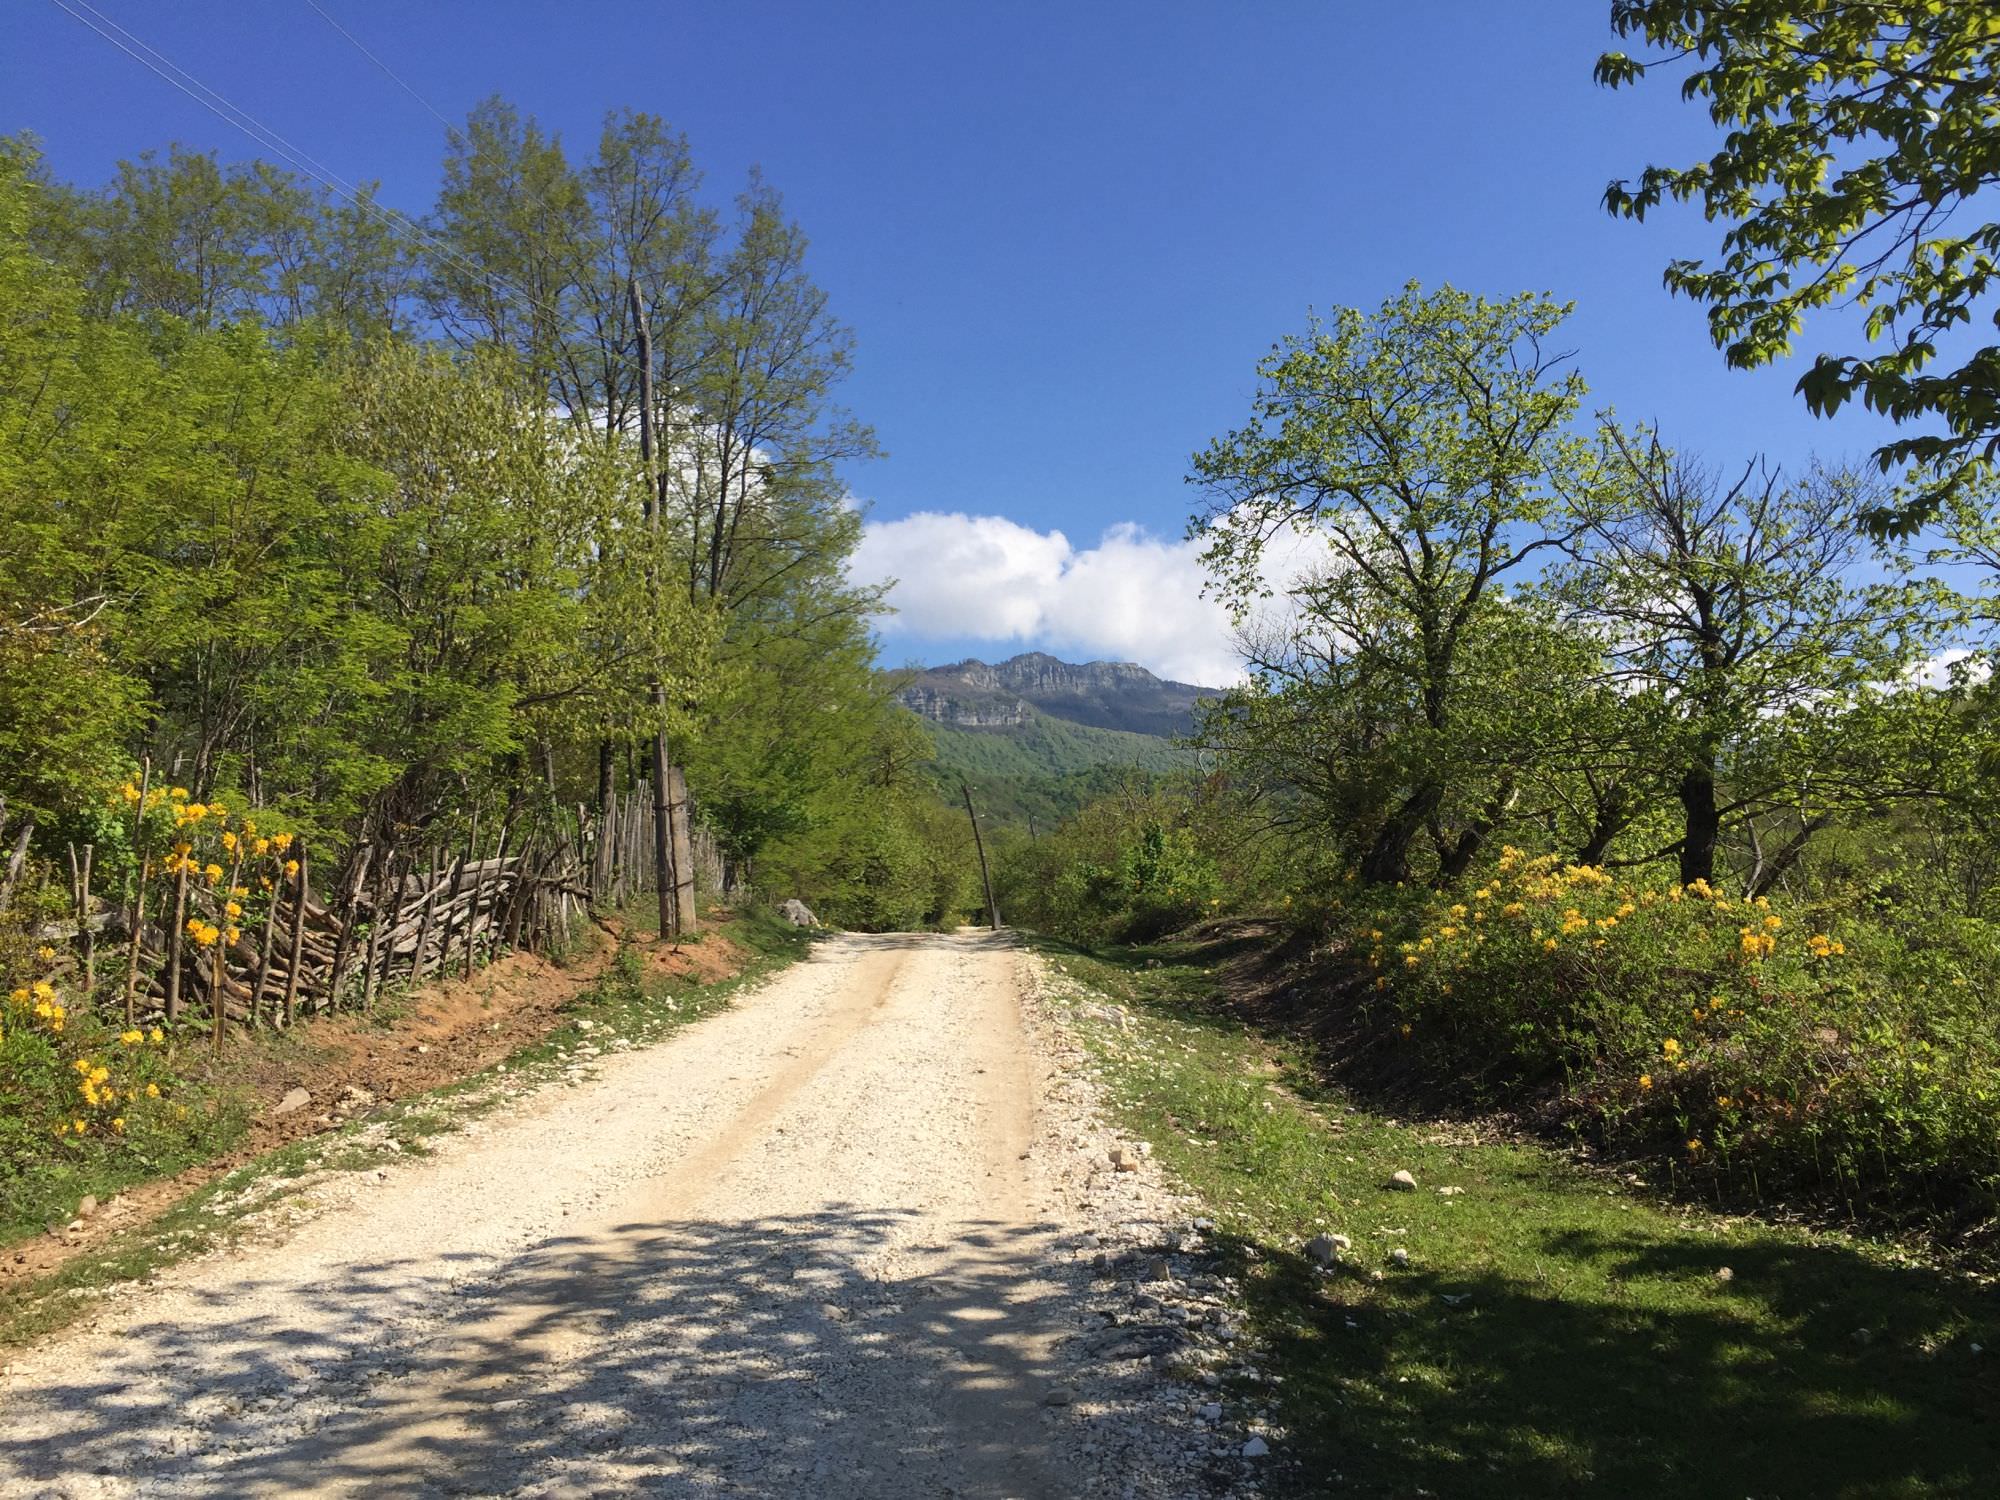
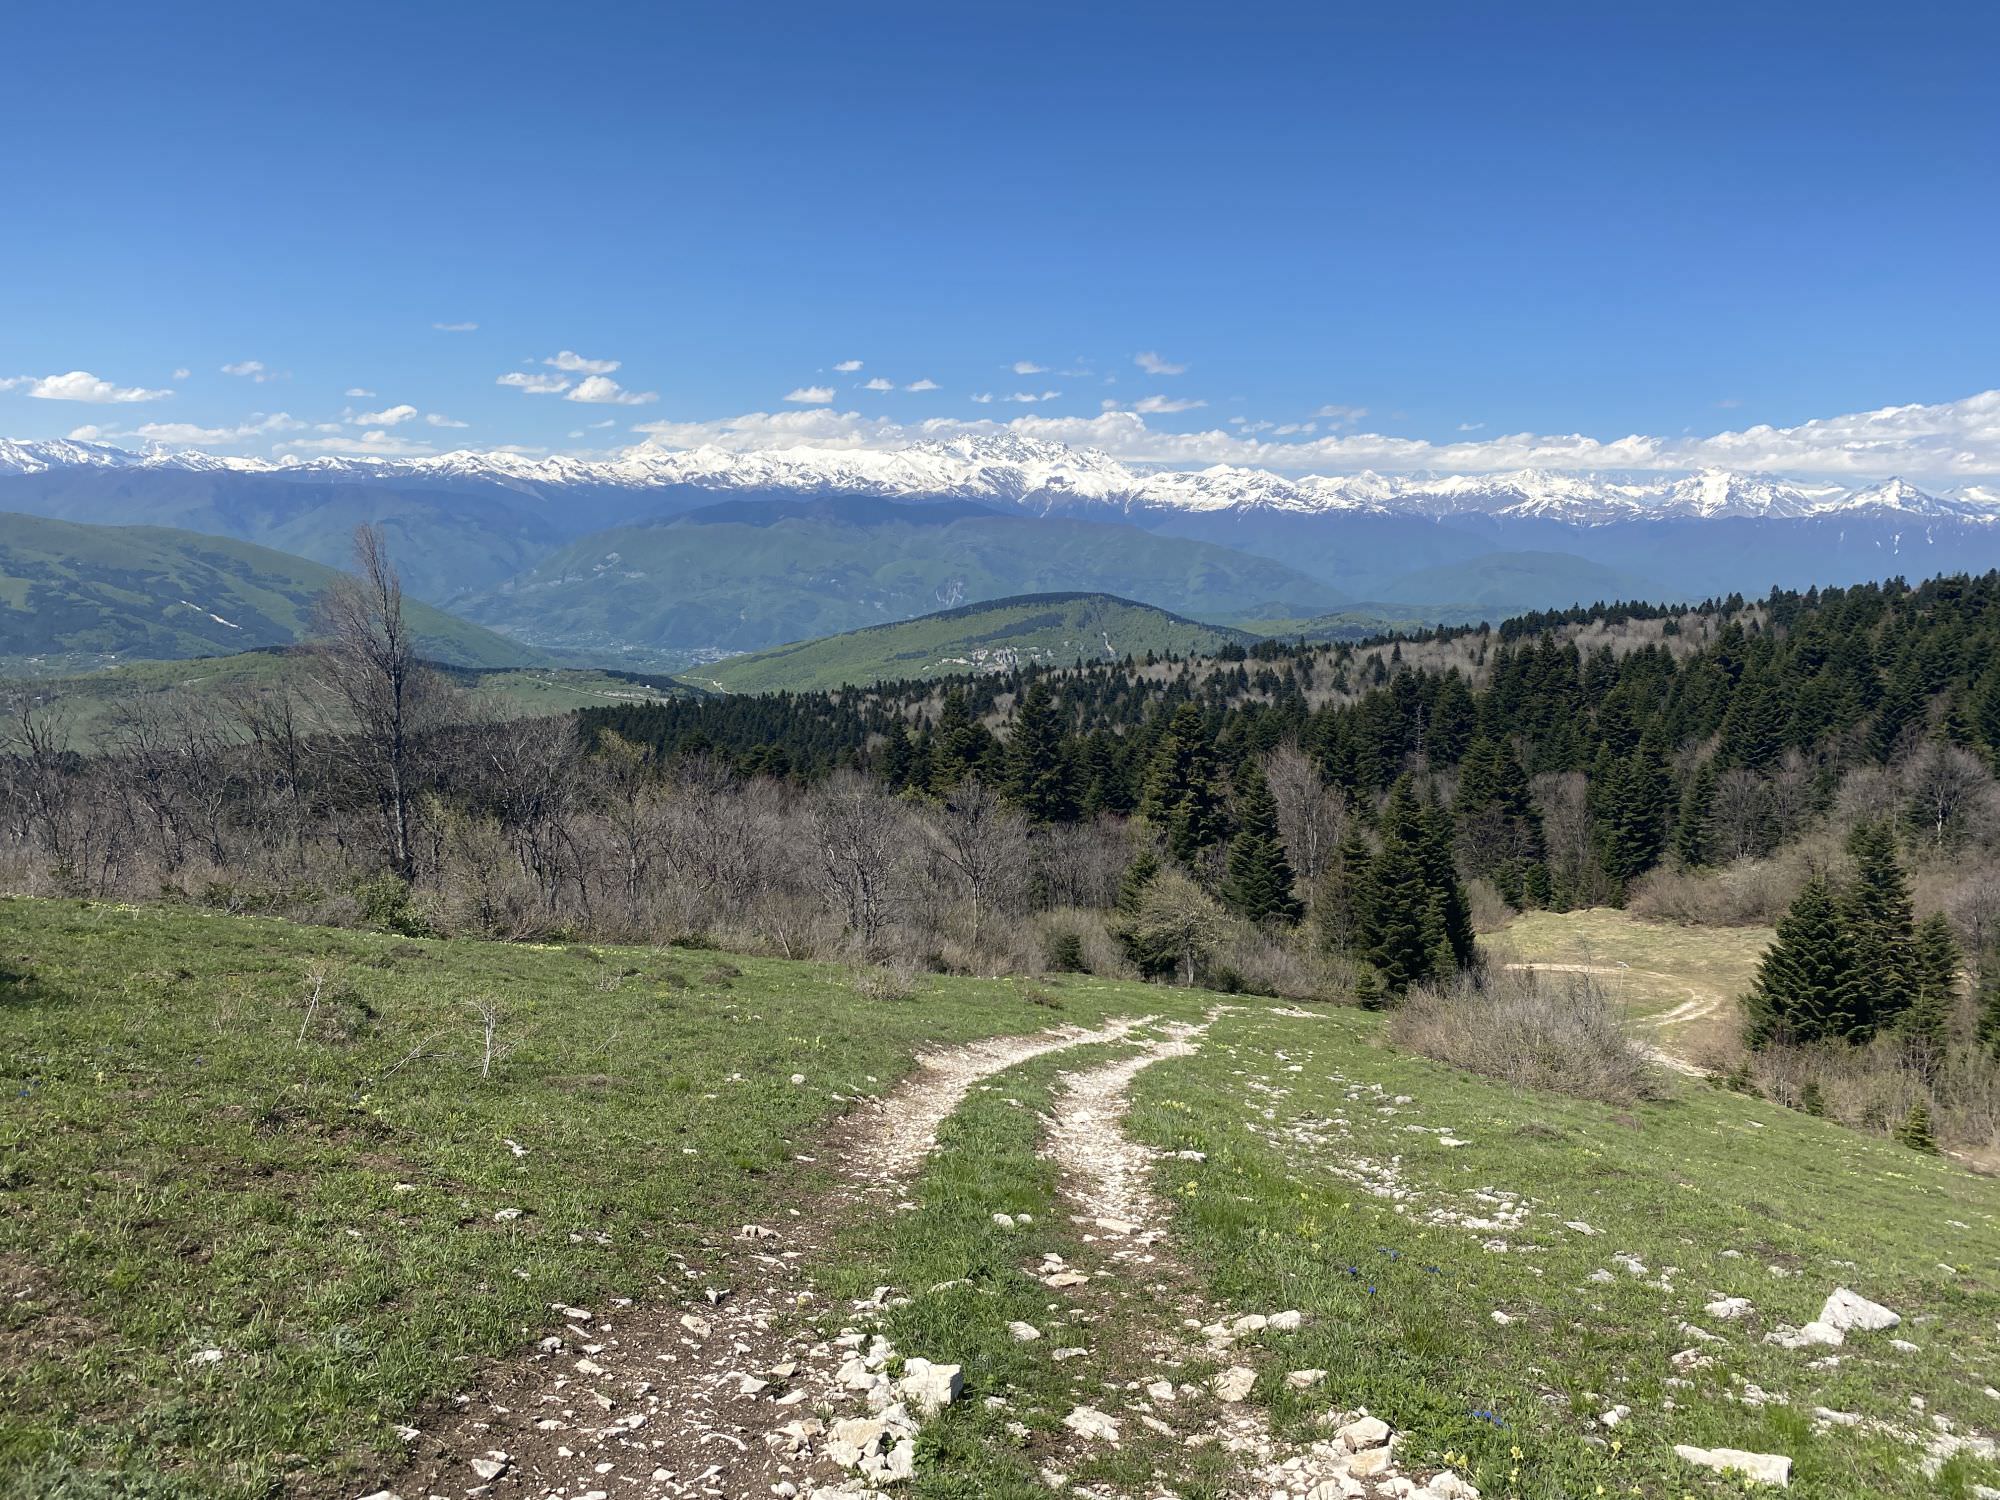
Path ahead to the Nakerala ridge
Soon you will encounter several houses and take a small path between them. After 1,8 km pay attention: don't follow the more inviting way straight but take a rather unattractive and half-vanished mud road uphill. Soon after, you will see a yellow sign again; turn right there and continue your slowly way up on a wide, well-trotted mud road. At kilometre four, you will first find a tiny old hut (you could camp here, but the hut itself is unsuitable as shelter) and some meters after, a small creek, which you will cross. The following two kilometres, you will be surrounded by trees before entering a wide, open meadow on roughly 1.300m of altitude. Here, right next to a hut (more comfortable and accessible) is a nice spot for a small break while enjoying the view on the Lesser Caucasus.
Now, the path leads into the forest again and continuously up. You will cross another small meadow with two yellow signs in not even 50 metres distance; from there you have to climb the massif right in front of you. Soon after re-entering the forest, the trail becomes more and more narrow and soon resembles steep rocky stairs. After a total of 8,5km you reached Nakerala Campsite; congratulations, you crossed by feet from Imereti to Lechkhumi!
Though the campsite is not too convincing (rather bumpy, no water, no view), it is a chance to rest if necessary. What you can find there for sure though is plenty of bear garlic; just a foretaste of what will await you the next hours…
Once ready, descend the northern slope, which is according to the signs a quick-and-easy six-kilometre walk. Unfortunately, nature had some other plans and took back a lot of the path already. As it is not the most popular trail, official maintenance seems to be rather seldom. Especially fallen trees make it hard to follow the initial route and snow may do its part as well. Anyhow, with proper footwear, maybe poles at hand, and some GPS-gear, you will manage your way down and out.
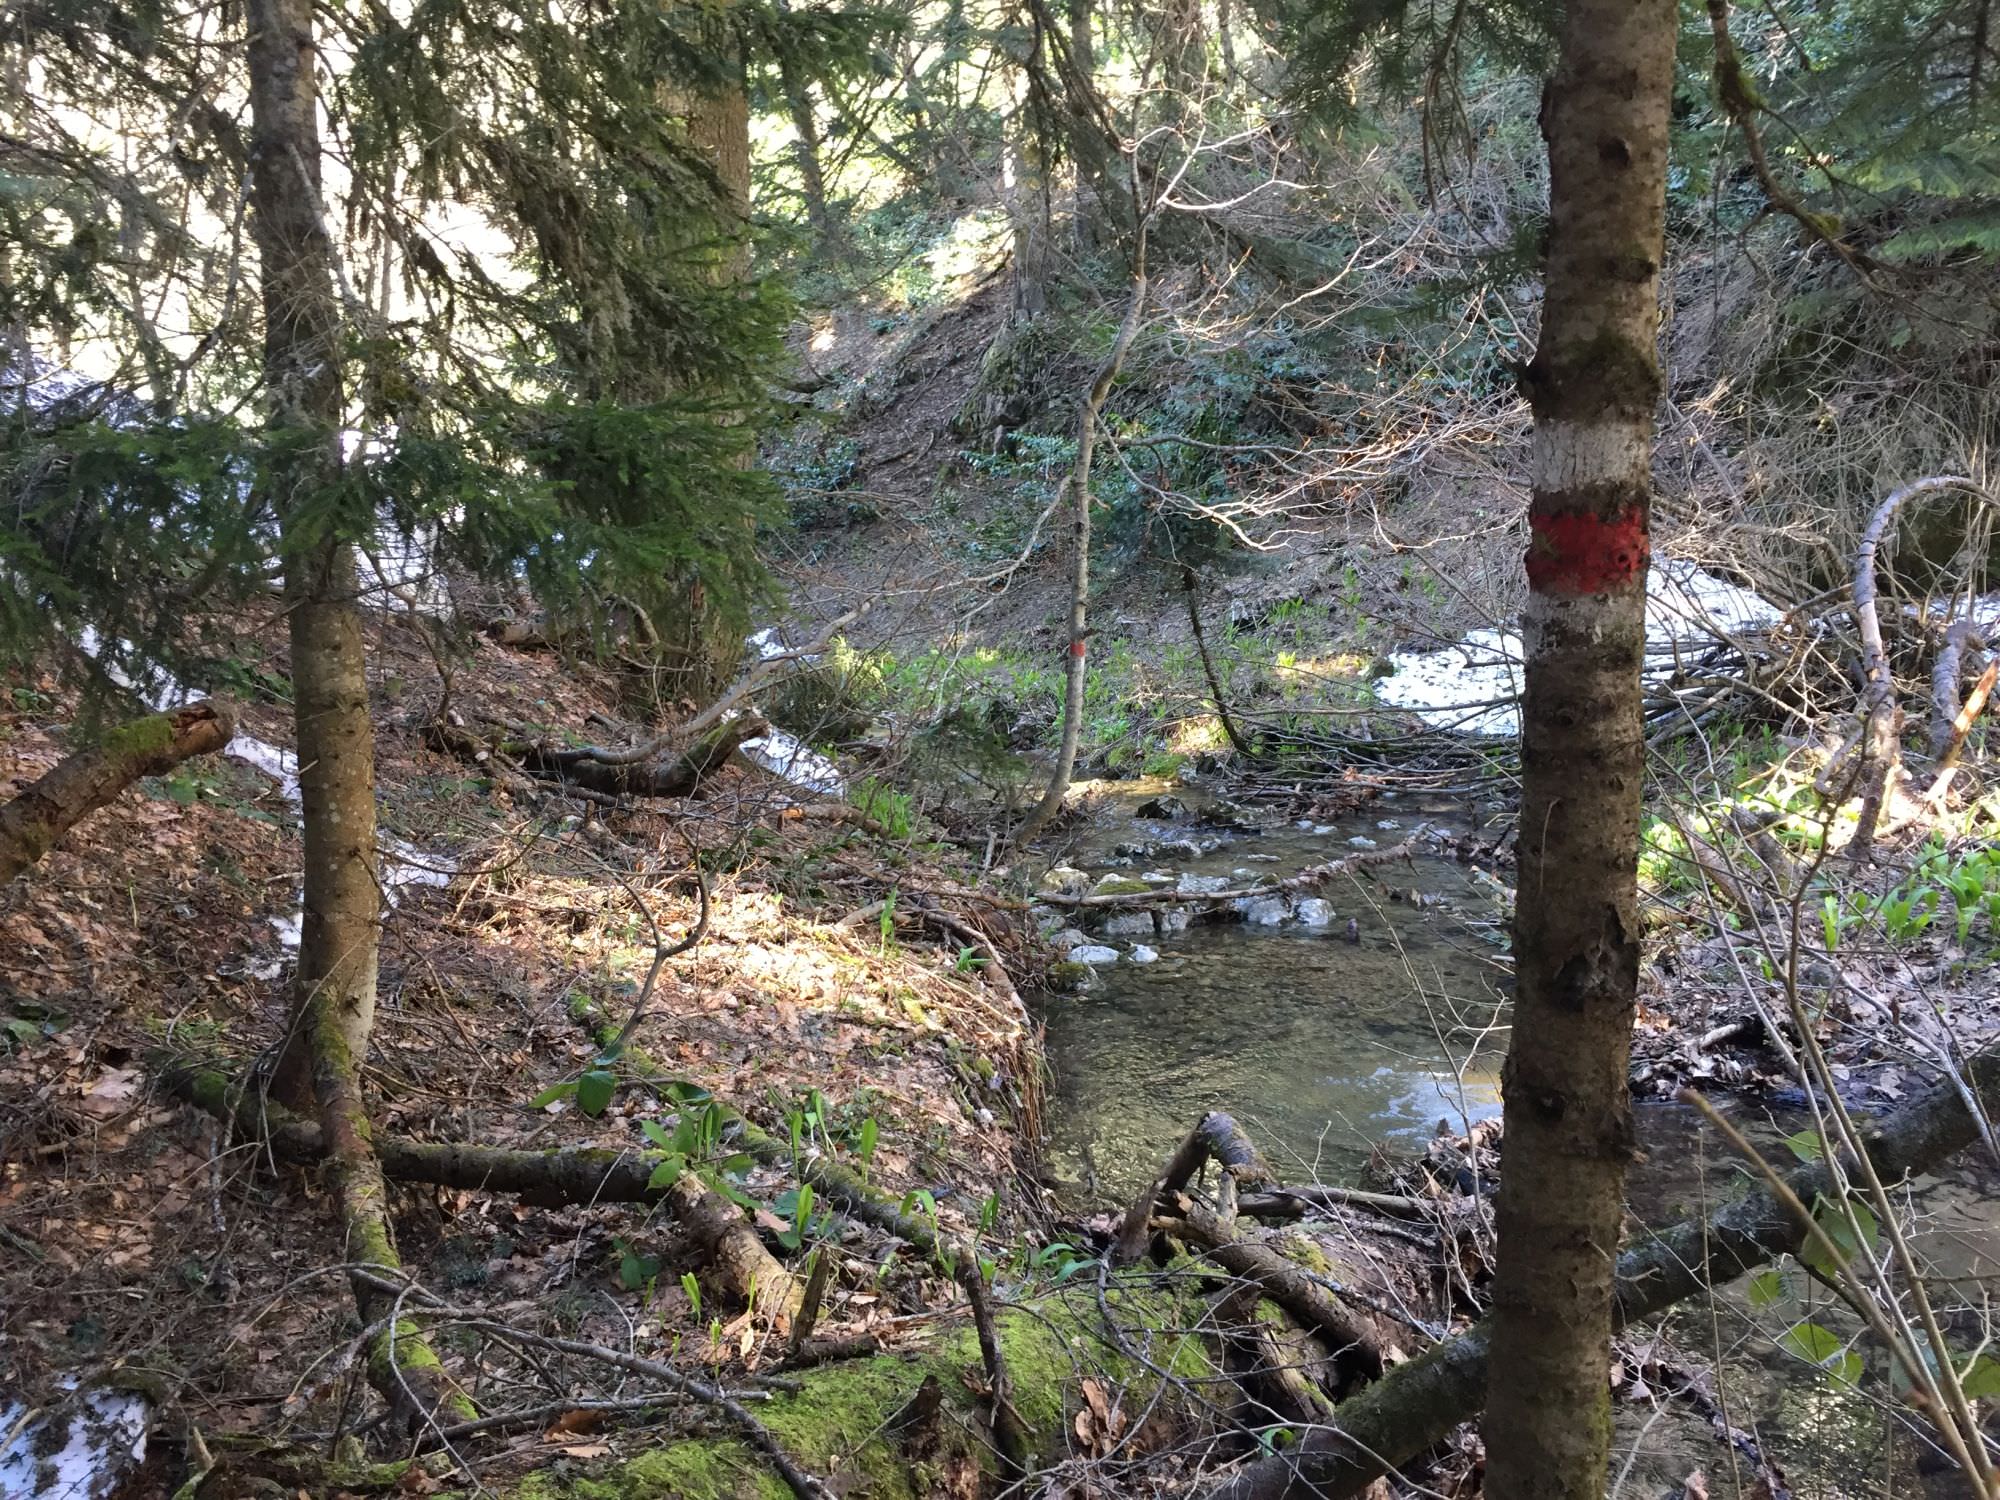
When heading down, stick to the white-red-white marks for a bit less than a kilometre until you cross a small creek. From there you simply zigzag down your own way for the next 300 metres of altitude in northern direction. You will come to a kind of valley on roughly 1.475 metres, where you will take a left turn (westwards) and mainly follow your ears towards the river. Some 500 metres of traversing later you will find white-red-white marks again on three trees within only a few meters.
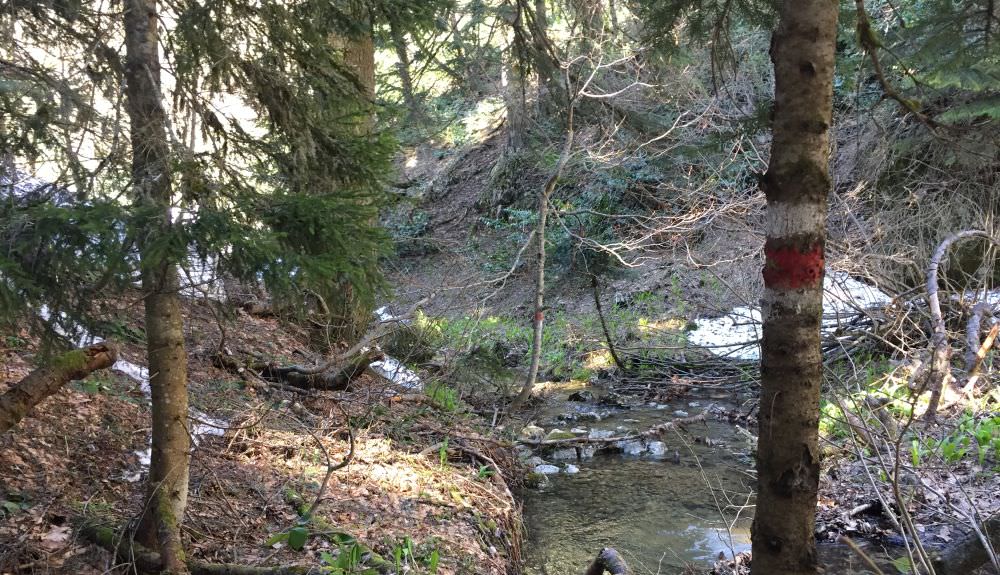
Marks on the river
On the next four kilometres, the small river and you will basically become one: you will walk on it, cross it, be next to it, on it again, and so on, and so on. Though the water goes apparently underground after the first 1,5 km, the bear garlic will accompany you for the entire route. Though this is kind of nice in the beginning, it may drive you mad after a while as it is simply all over the place and all you will see. To make it not the last thing you will see, pay attention to where you step: as you constantly follow the riverbed, you can’t get lost; anyhow, some spots are very slippery, and the water is doing better in going down small cascades. To avoid climbing, you can use the small by-paths which are appearing sporadically next to the riverbed at times. On the last kilometres (marked in the GPX-file), there are at least three: the first two lead for sure back on the trail, the third one brings you certainly to the reservoir but potentially at another location.
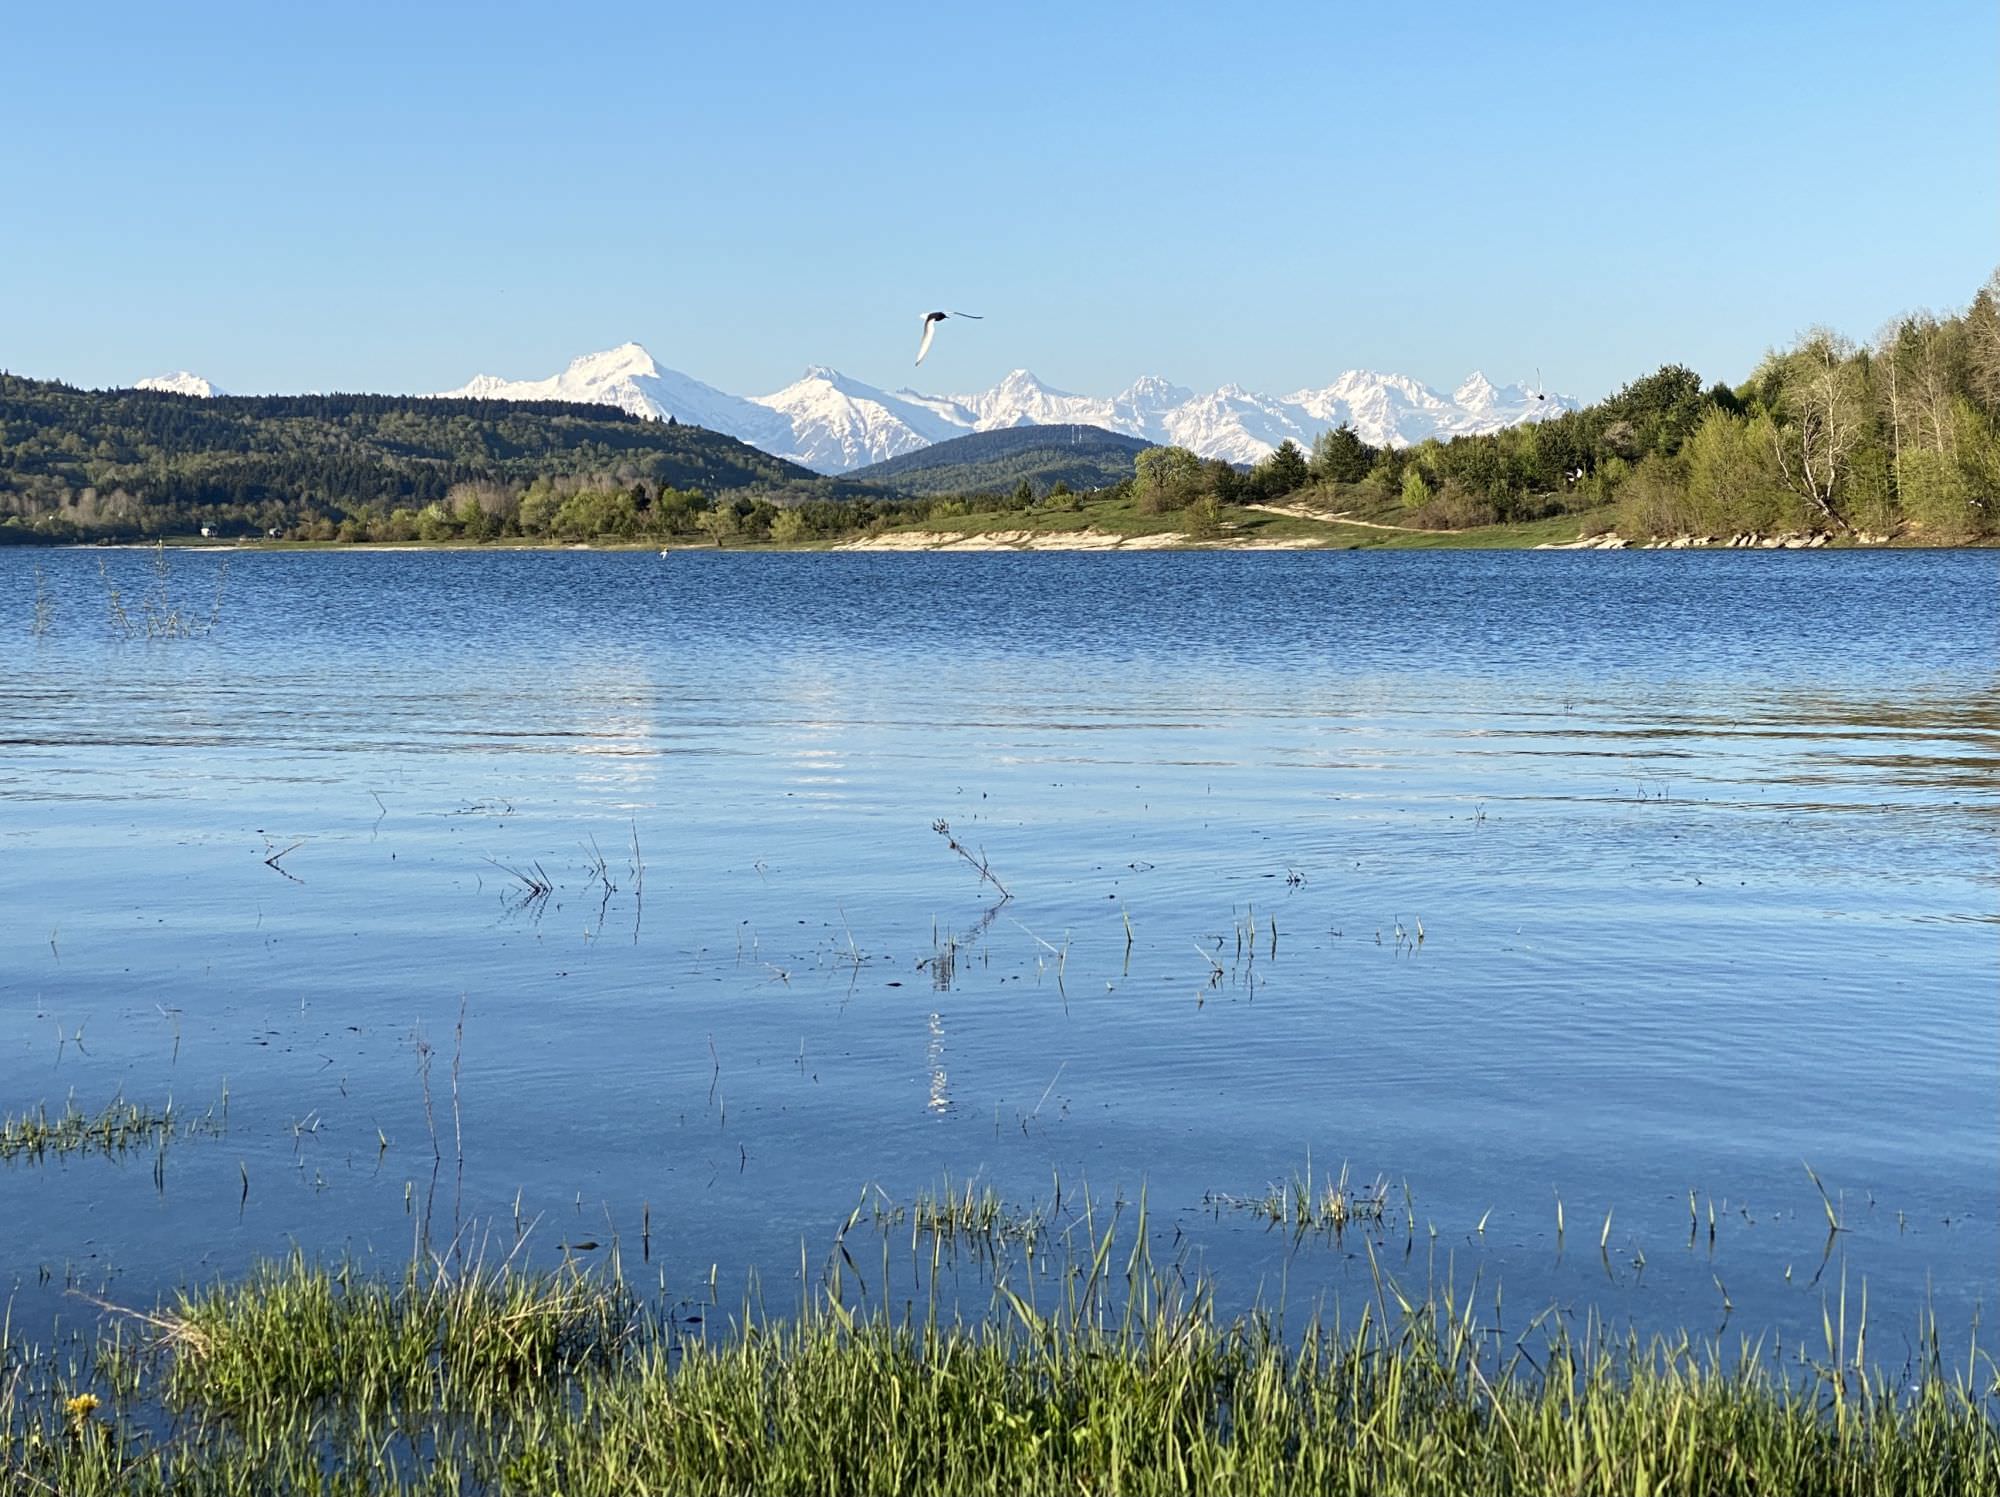
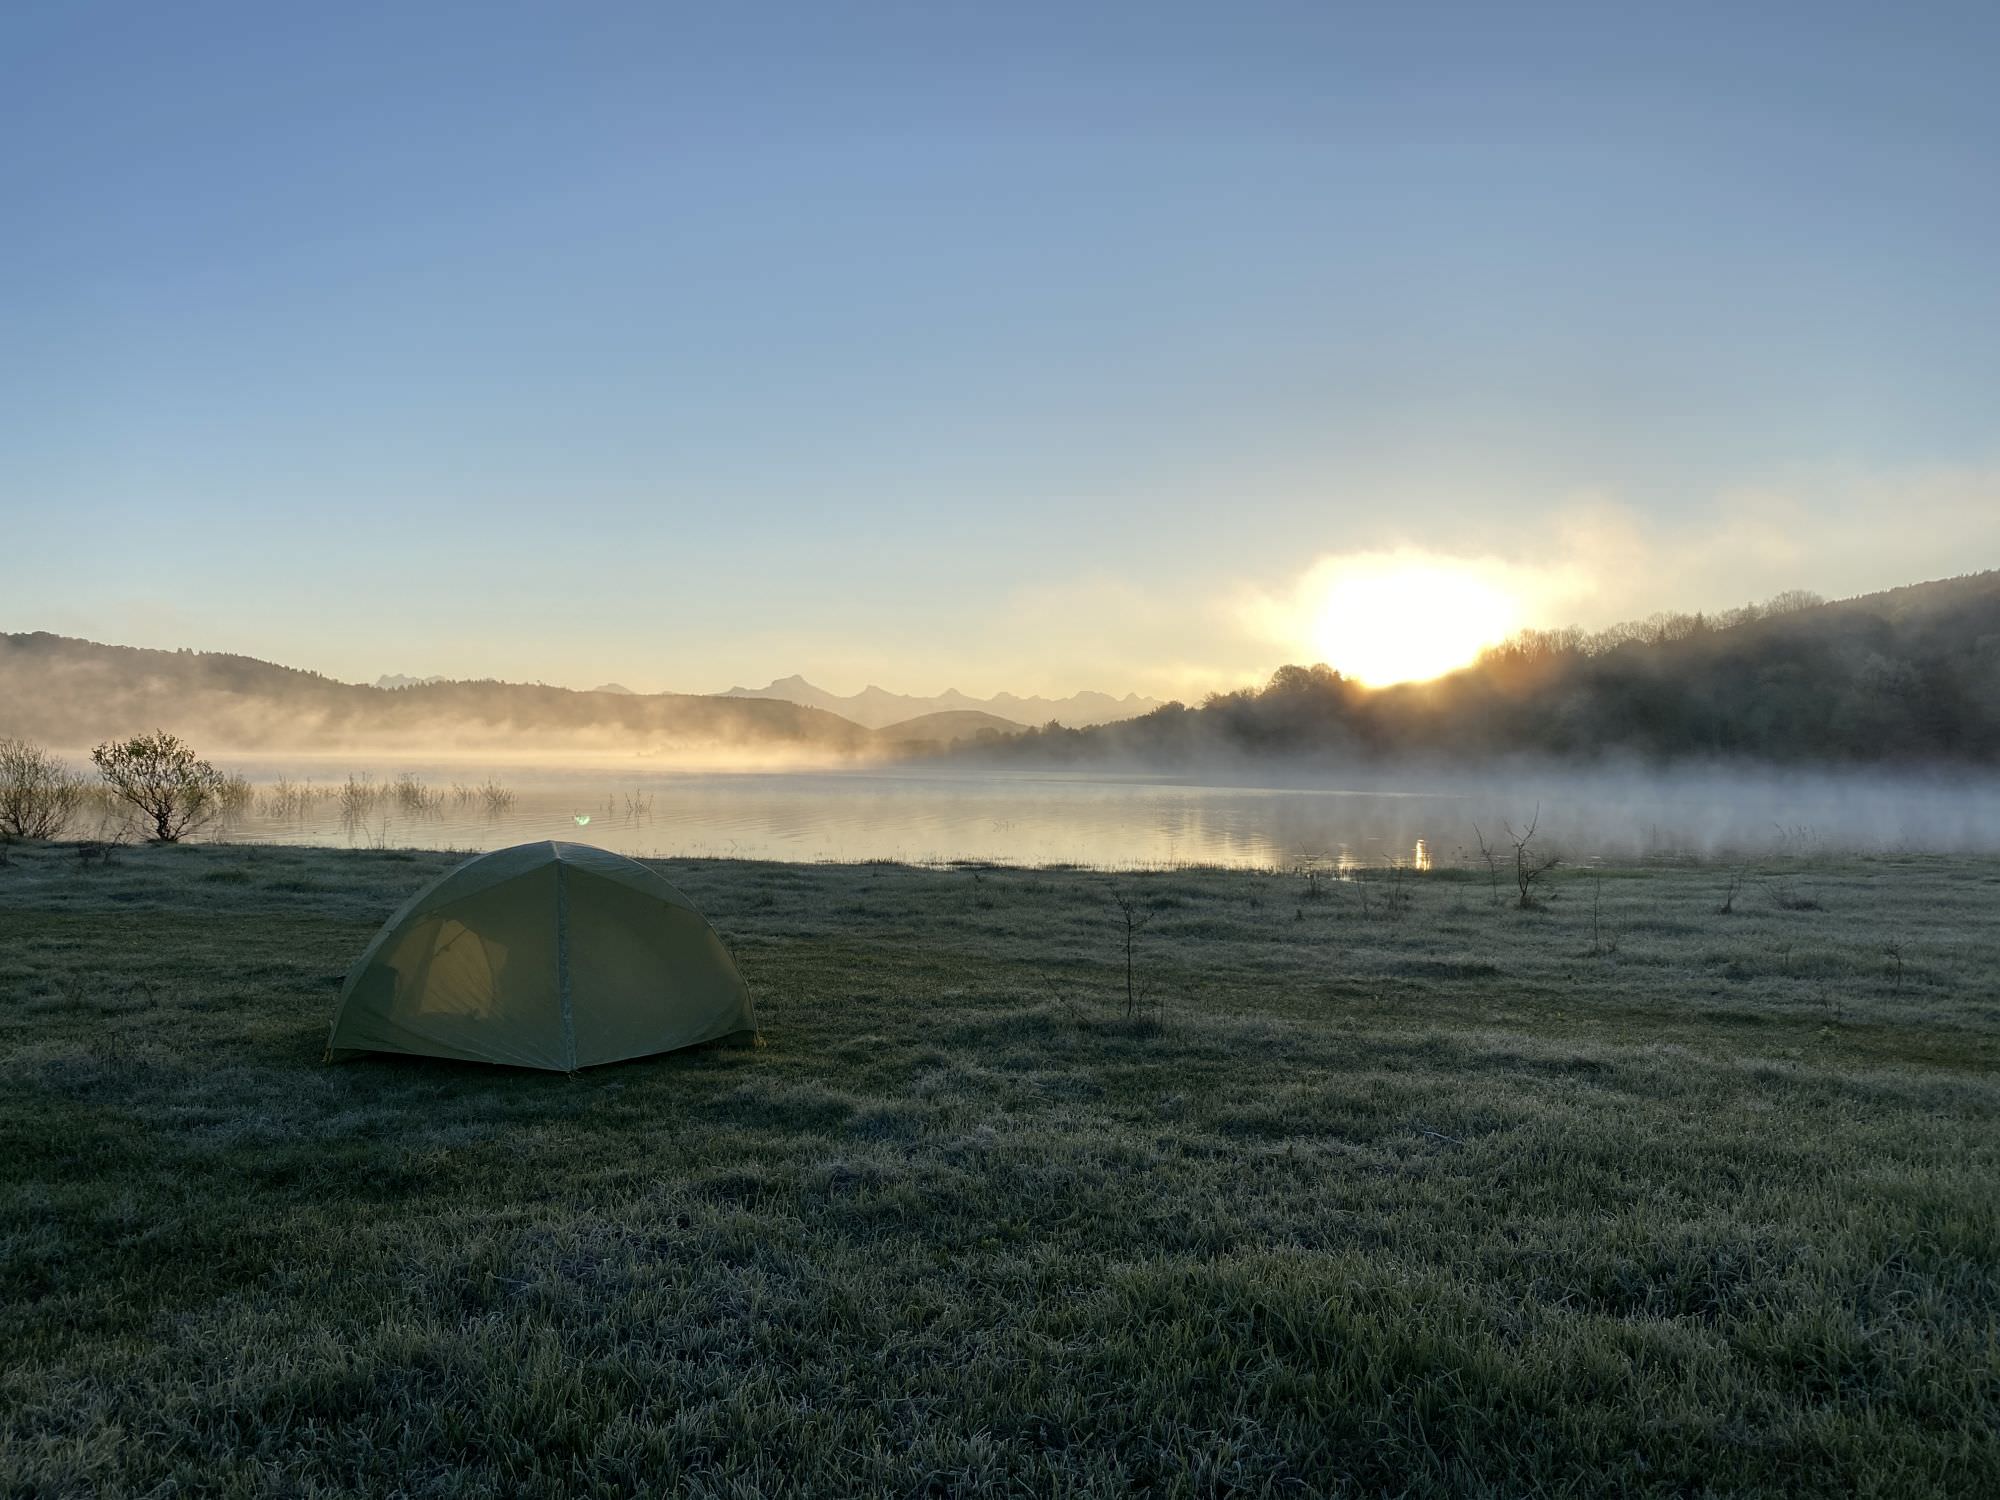
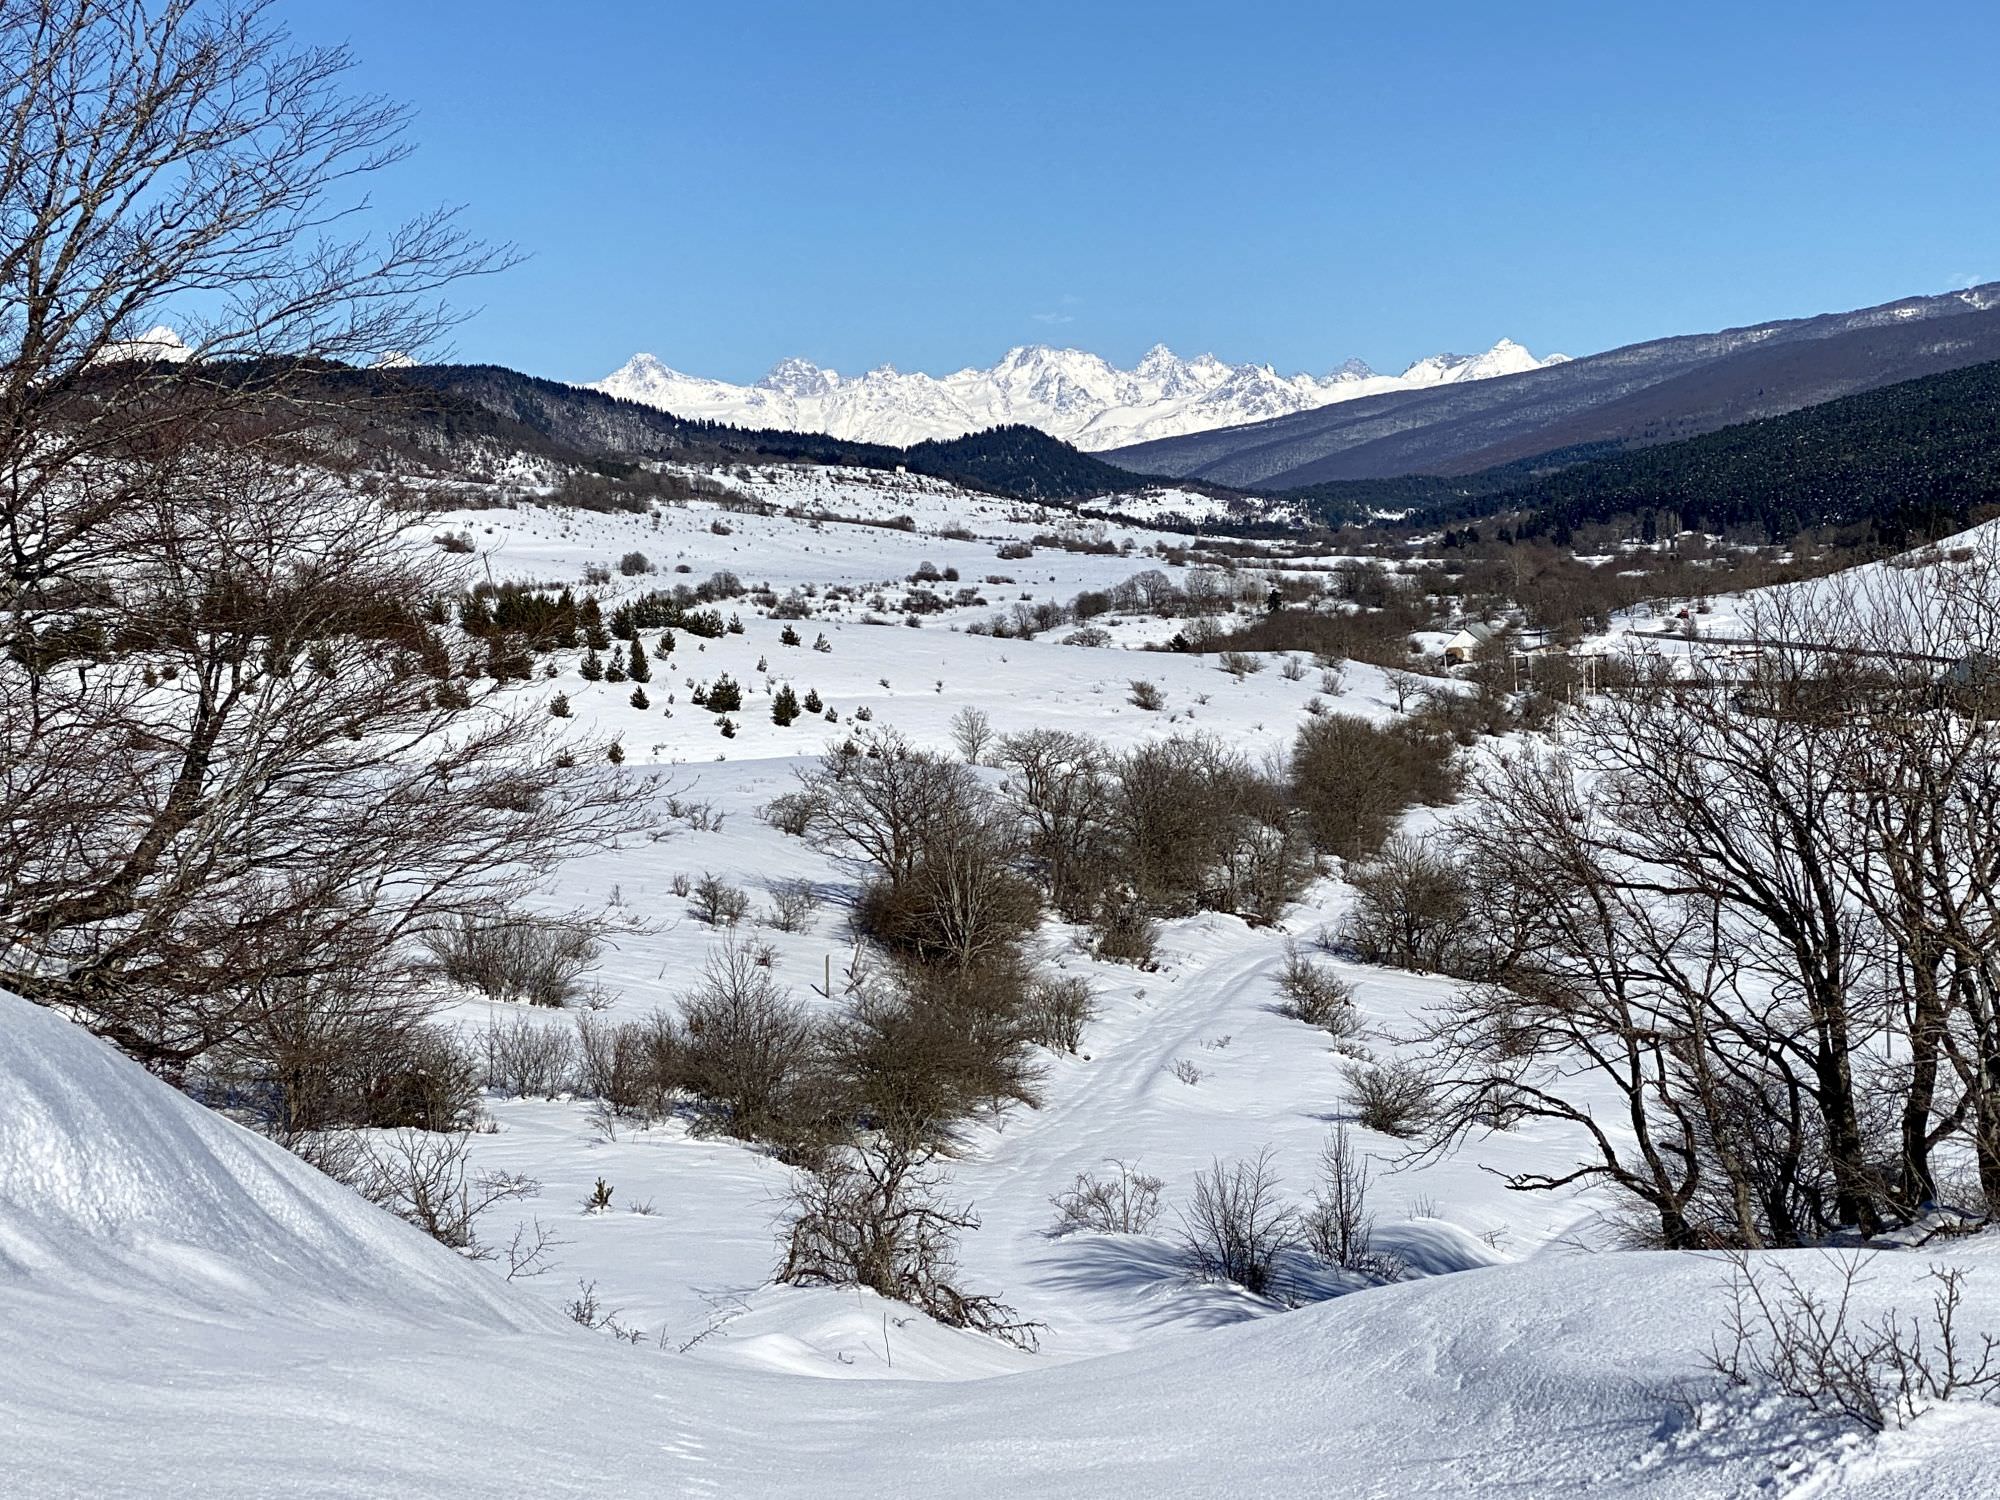
The morning will welcome you with a magically misty Shaori Reservoir and a great view on the surrounding Greater Caucasus.
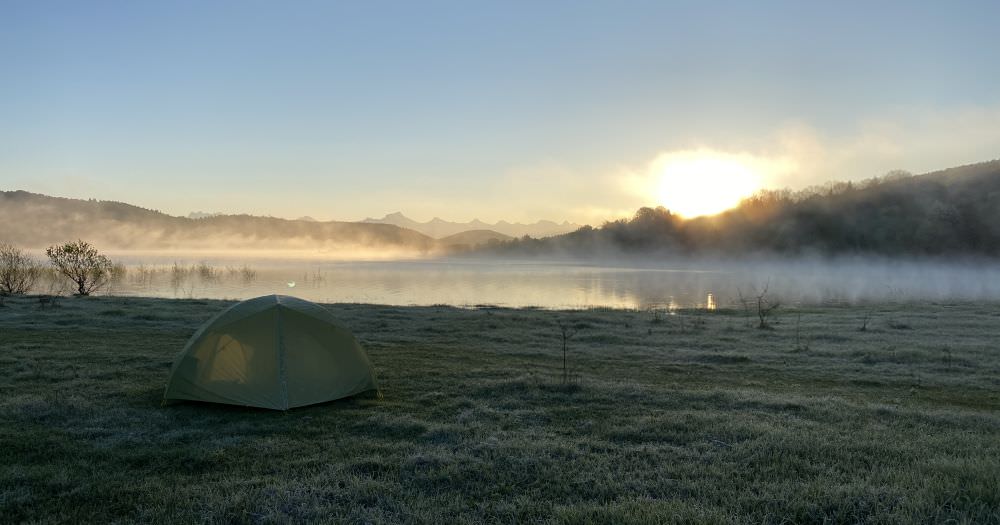
View over Shaori Reservoir in the morning
From your camping spot, navigate back to the main path leading along the southern-eastern shore. The mud road will split up and unite several times over the next four kilometres and you can choose your own way; just ensure to keep the direction. Soon you will reach the end of the reservoir and a small creek to cross. Another kilometre later you will come to a junction: the left path will lead you to the Tkibuli-Nikortsminda-Street (about 5km), which is also the starting point or end for the above-mentioned alternative two-day options; the up-hill path straight will reunite later with the recorded trail and will allow a nice view on the ridges around Oni; the recorded path on the right will lead you along some summer houses towards Kveda Tlughi – either over an tumbledown bridge or through the small and refreshing Gortskhali River.
![View on Greater Caucasus towards Oni from alternative path in winter]](/Images/Treks/Shaori/05_Caucasus.jpg)
View on Greater Caucasus towards Oni from alternative path in winter
No matter if you went up-hill to the viewpoint or crossed the river, you will find yourself at a junction between some farms and a smaller hill on the right-hand side. While the left road is leading to Kveda Tlughi, you head to the right around the hill. On the next 1,5 kilometre you will pass by the artificial Chologa Waterfall and a hut with official camping spot (not too appealing); if you have some spare time, you can also explore close-by Sakishore Cave.
After a total of eight flat kilometres, you will now steadily ascend about 800 metres of altitude up to Satsalike Ridge over a distance of 10 kilometres: first on a shady forestry road, later on wide and open 4x4 paths. The trail is marked with white-yellow-white strips, easy to follow and easy to walk. Before heading up, ensure that you have filled up your water reserves at the waterfall or one of the river crossings before, as you won’t find any water source until half of the descend the next day.
In the forest, stick to the right (western) route after 2,5km to ensure some great views on the Greater Caucasus later. At the end of the tree level (another two kilometre later), you will find a yellow marker; there, take the steeper path right in front of you instead of the car road on the left to enjoy the Greater Caucasus (Tetnuldi, Chumkara, and other peaks) behind you in all its beauty. Just some walking later you will encounter a wide meadow on your right which allows views towards Mt. Khvamli and the Askhi Massif. Here you also have the chance to explore the "Satsalike Art Hut", a partially abandoned facility with plenty of paintings on the walls of the second floor – a small wooden ladder leads you the way up. The surrounding also allows camping if needed.
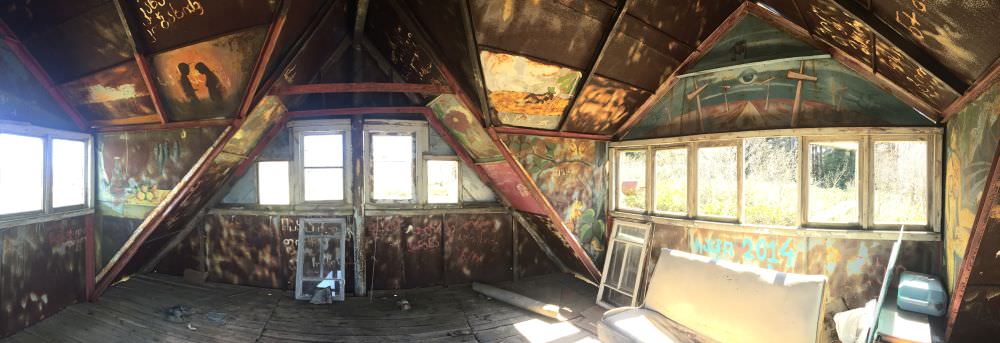
Satsalike Art Hut
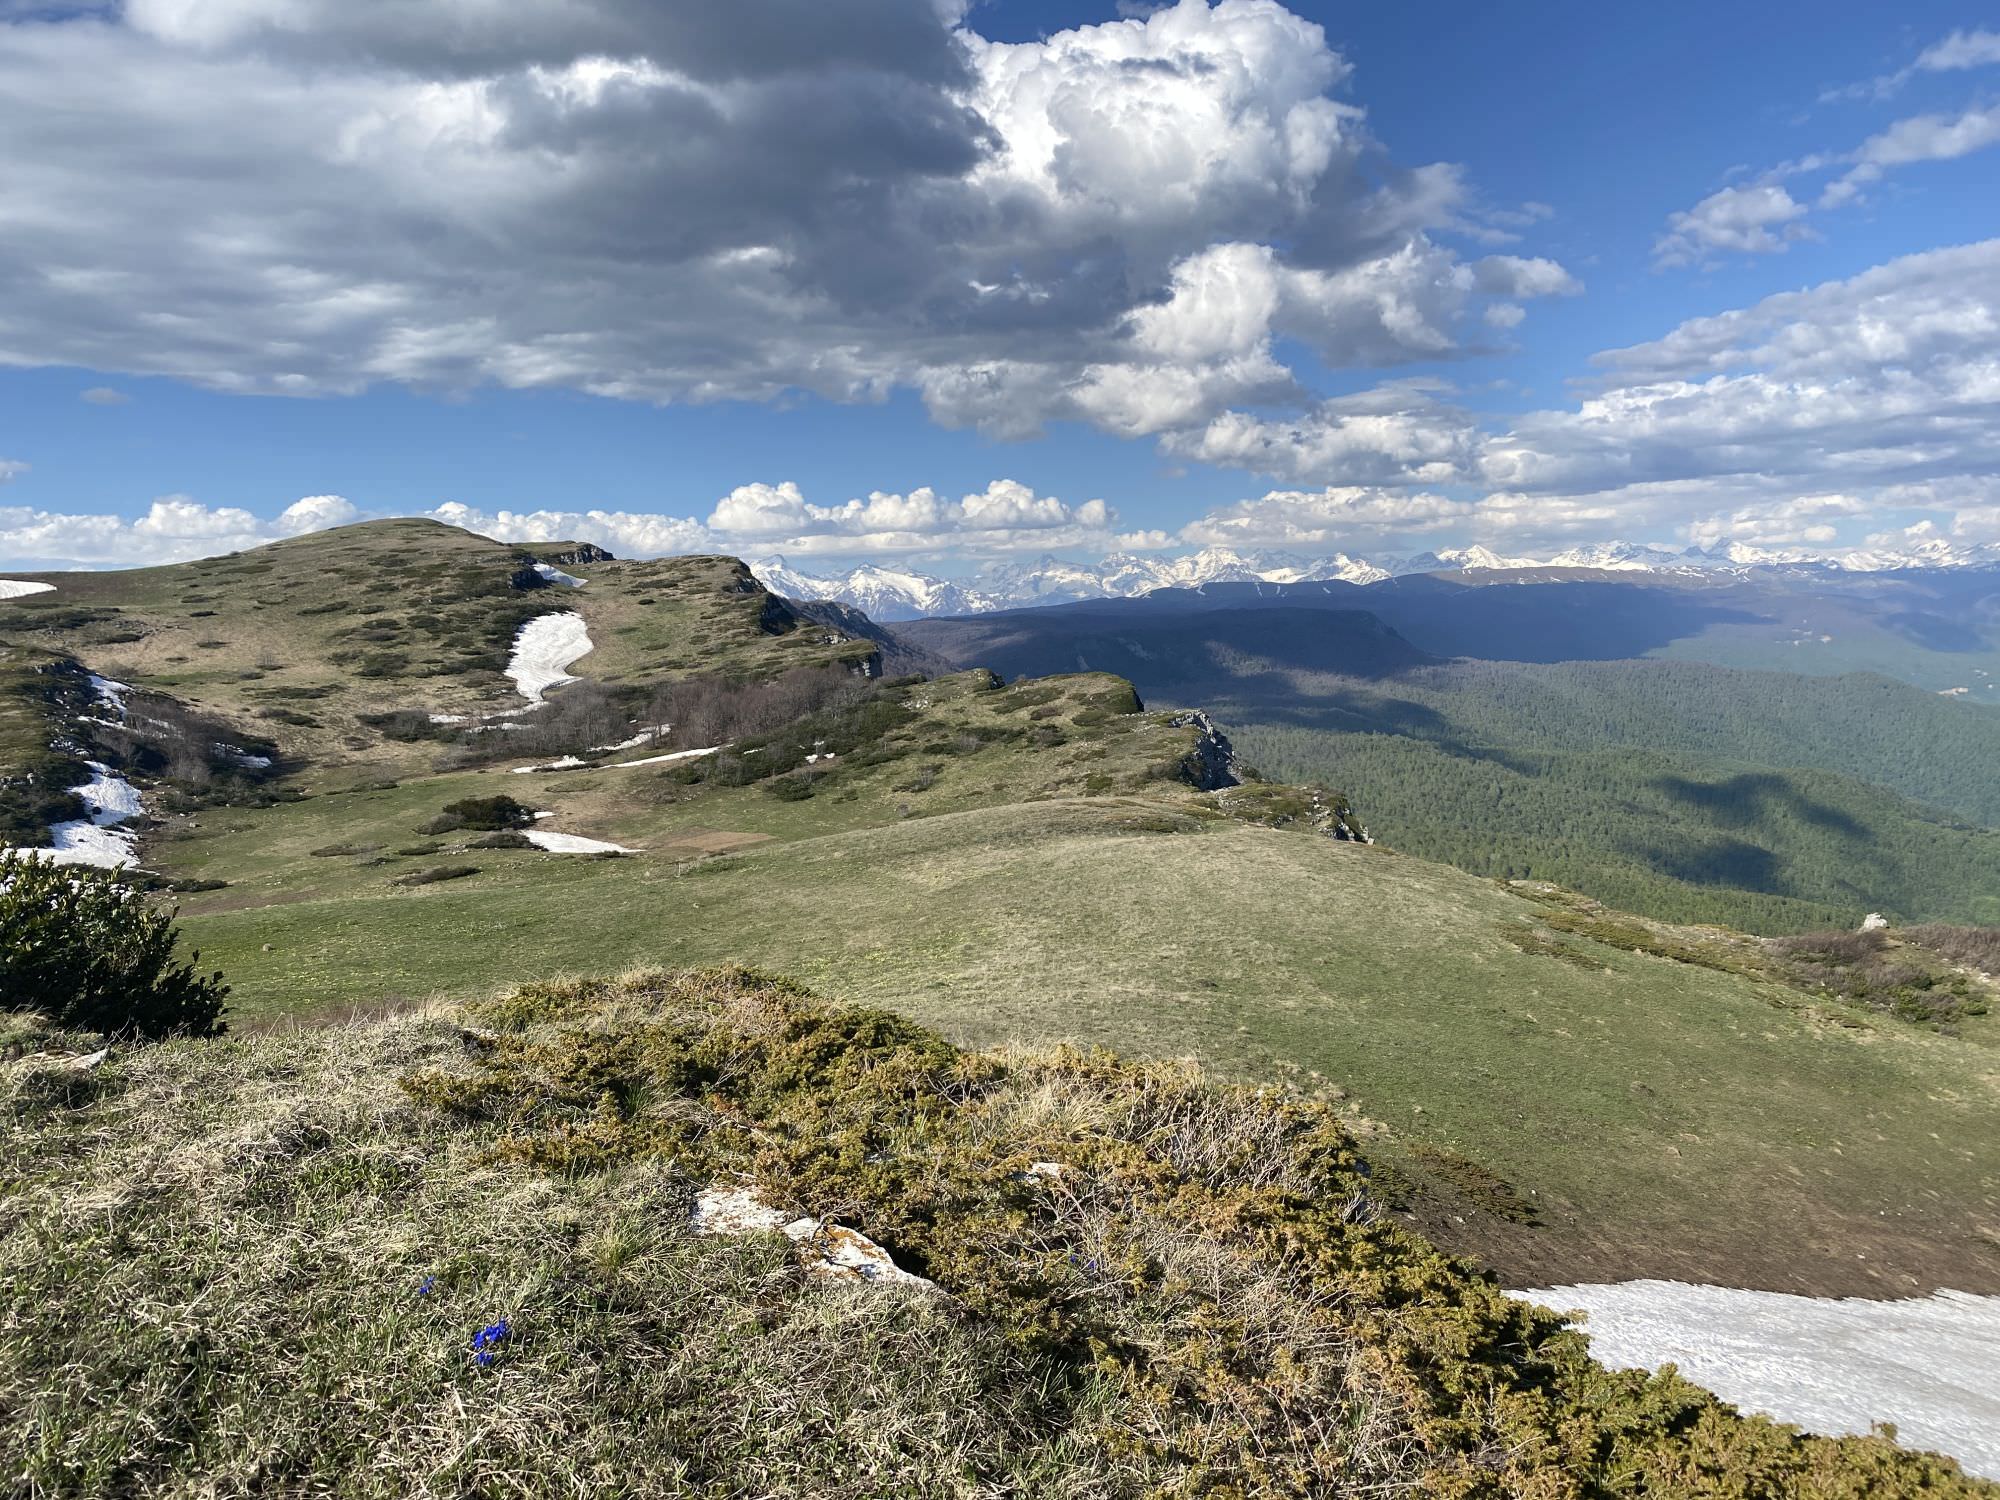
From the hut, return to the mud road and follow the path through the open hills. Today’s end will be indicated by the last yellow marker on Satsalike Ridge. From there you can look out for an ideal camping spot for the night; though the view is nice right next to the marker, the location is quite exposed to the wind and even dangerous in case of lightning due to the metal.
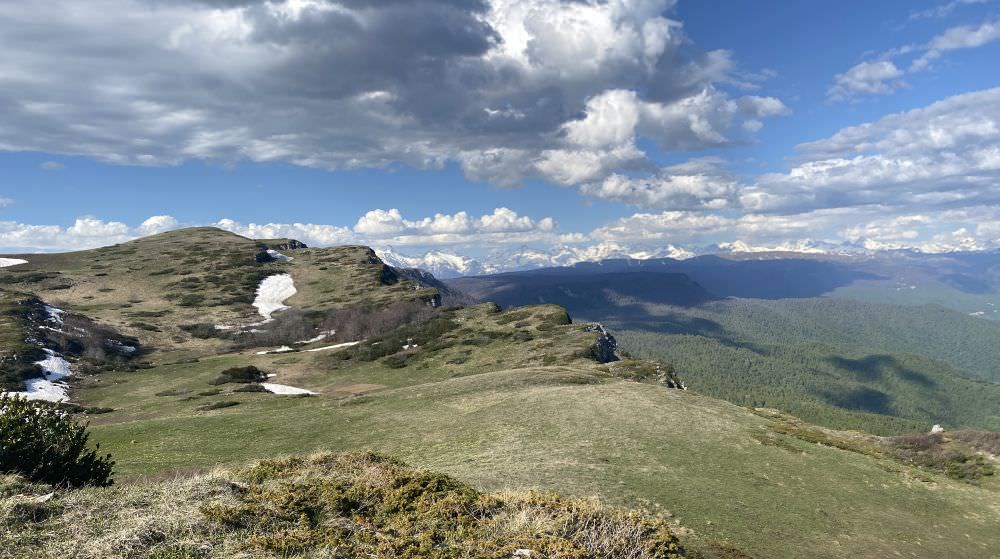
View on Satsalike Ridge
Return to the yellow marker and from there to the mud road you came from the day before; this time you follow it south-eastwards towards Khreiti and soon you are in Imereti again. After about two kilometres through light forest, you will be able to catch free sight on the Satsalike Ridge and its distinct rocky features. Some hundred meters later you can head towards Zeda Chalovani (5km) / Chiatura (18km) / Sachkhere (25km) instead of Khreiti, which allows to walk in parallel to the cliff for a while; anyhow, from Chalovani onwards, the map indicates rather asphalted roads and increased population.
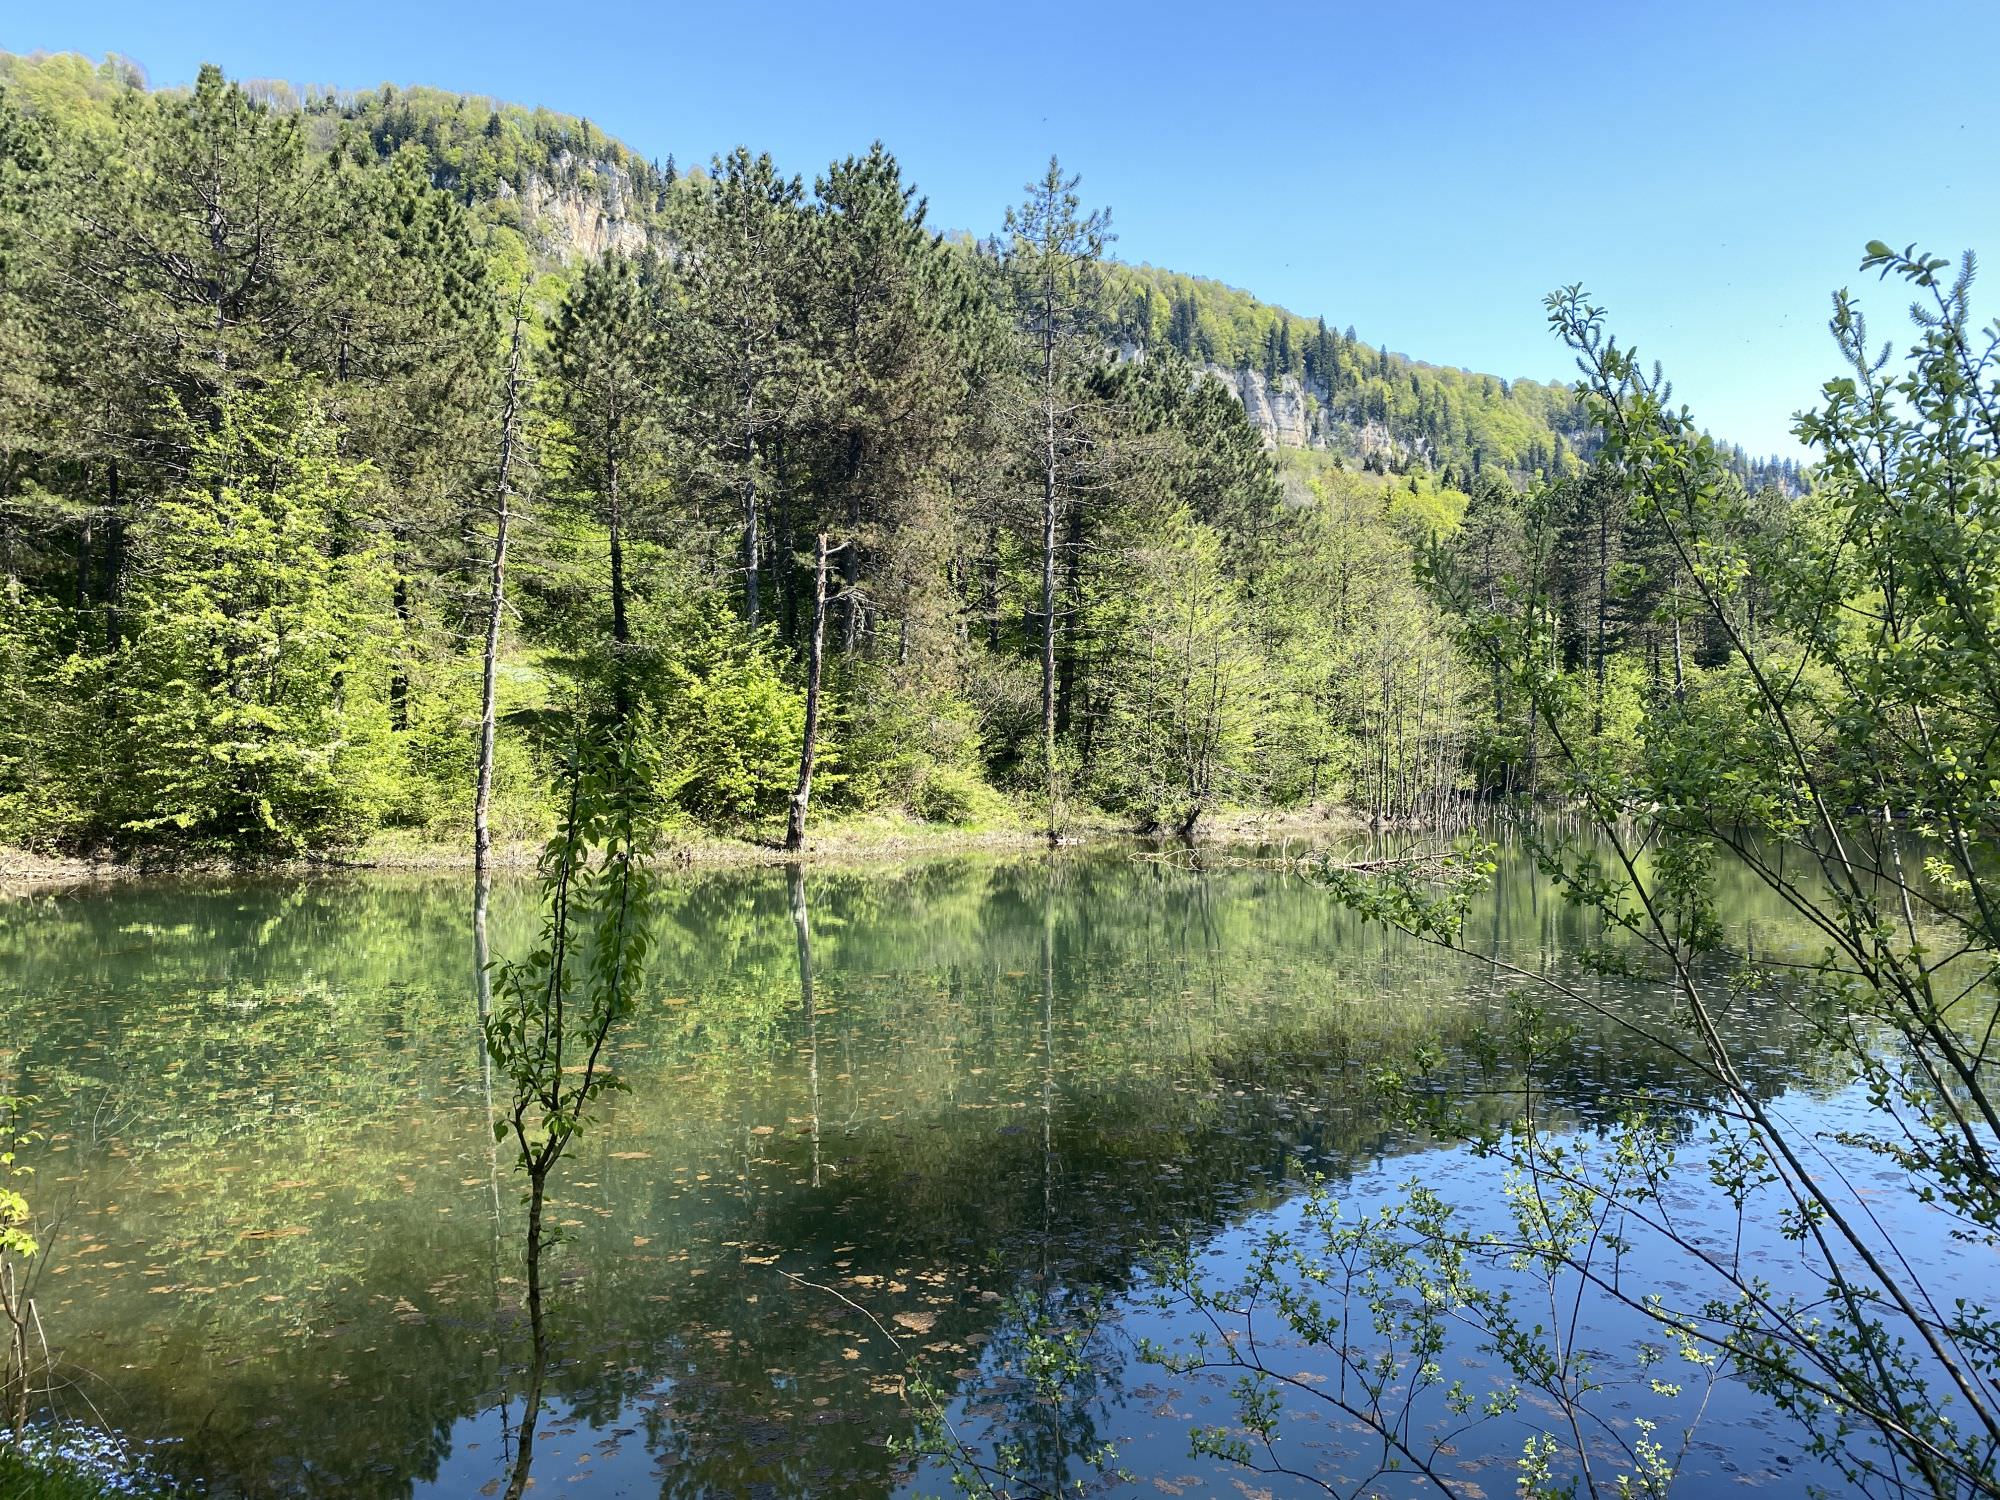
The way to Khreiti however continues as a mud road sometimes through meadows, sometimes through forest, often allowing nice views towards the Lesser Caucasus. After a total of four kilometres, you come to a junction close by to some ruins; from there, you can in theory head back north-westwards over the ridge to Shaori Reservoir (13km) or along the ridge even to Mukhura (23km). Going left will lead you further down on wide roads through a rather active forestry area. Soon you will come to a small picknick area on your lefthand side and some metres later you can take a small trail down to the swinging stone Kvakhuntia – despite its volume (1,5x2x3m) and weight (about eight tons) it is unfortunately less impressive than its sibling Kuakantsalia in Samegrelo as it is not embedded in an open ridge but hidden in the forest without a great view. Back on track, you will some minutes later cross the beginnings of the Orjala River, the first reliable water source since ascending the ridge the day before. Though a small detour, it is worth to follow up the stream and to enjoy the small hidden artificial mountain lake Dzigdziga Mitsa – for a small break in the shade or even a refreshing swim.
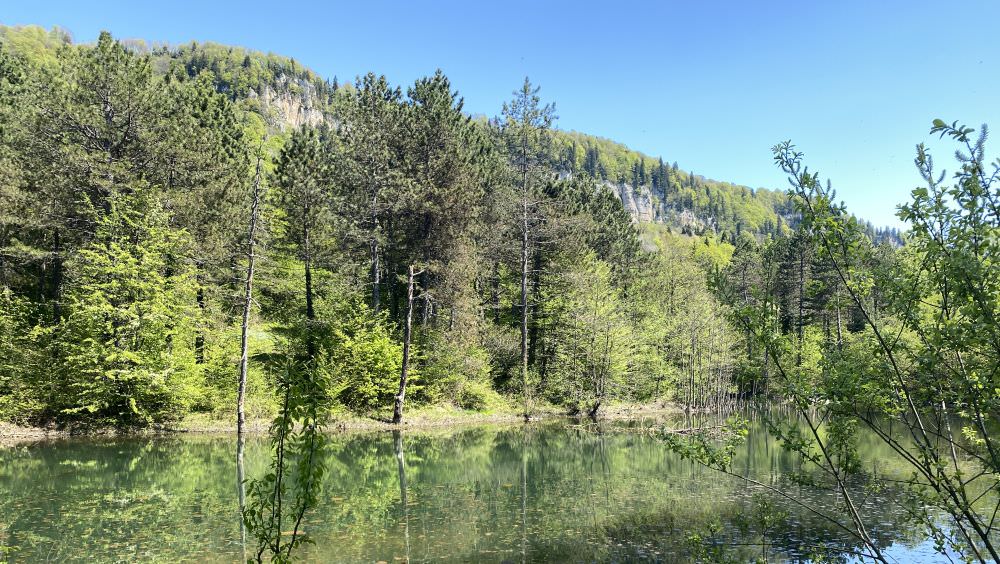
Dzigdziga Mitsa mountain lake
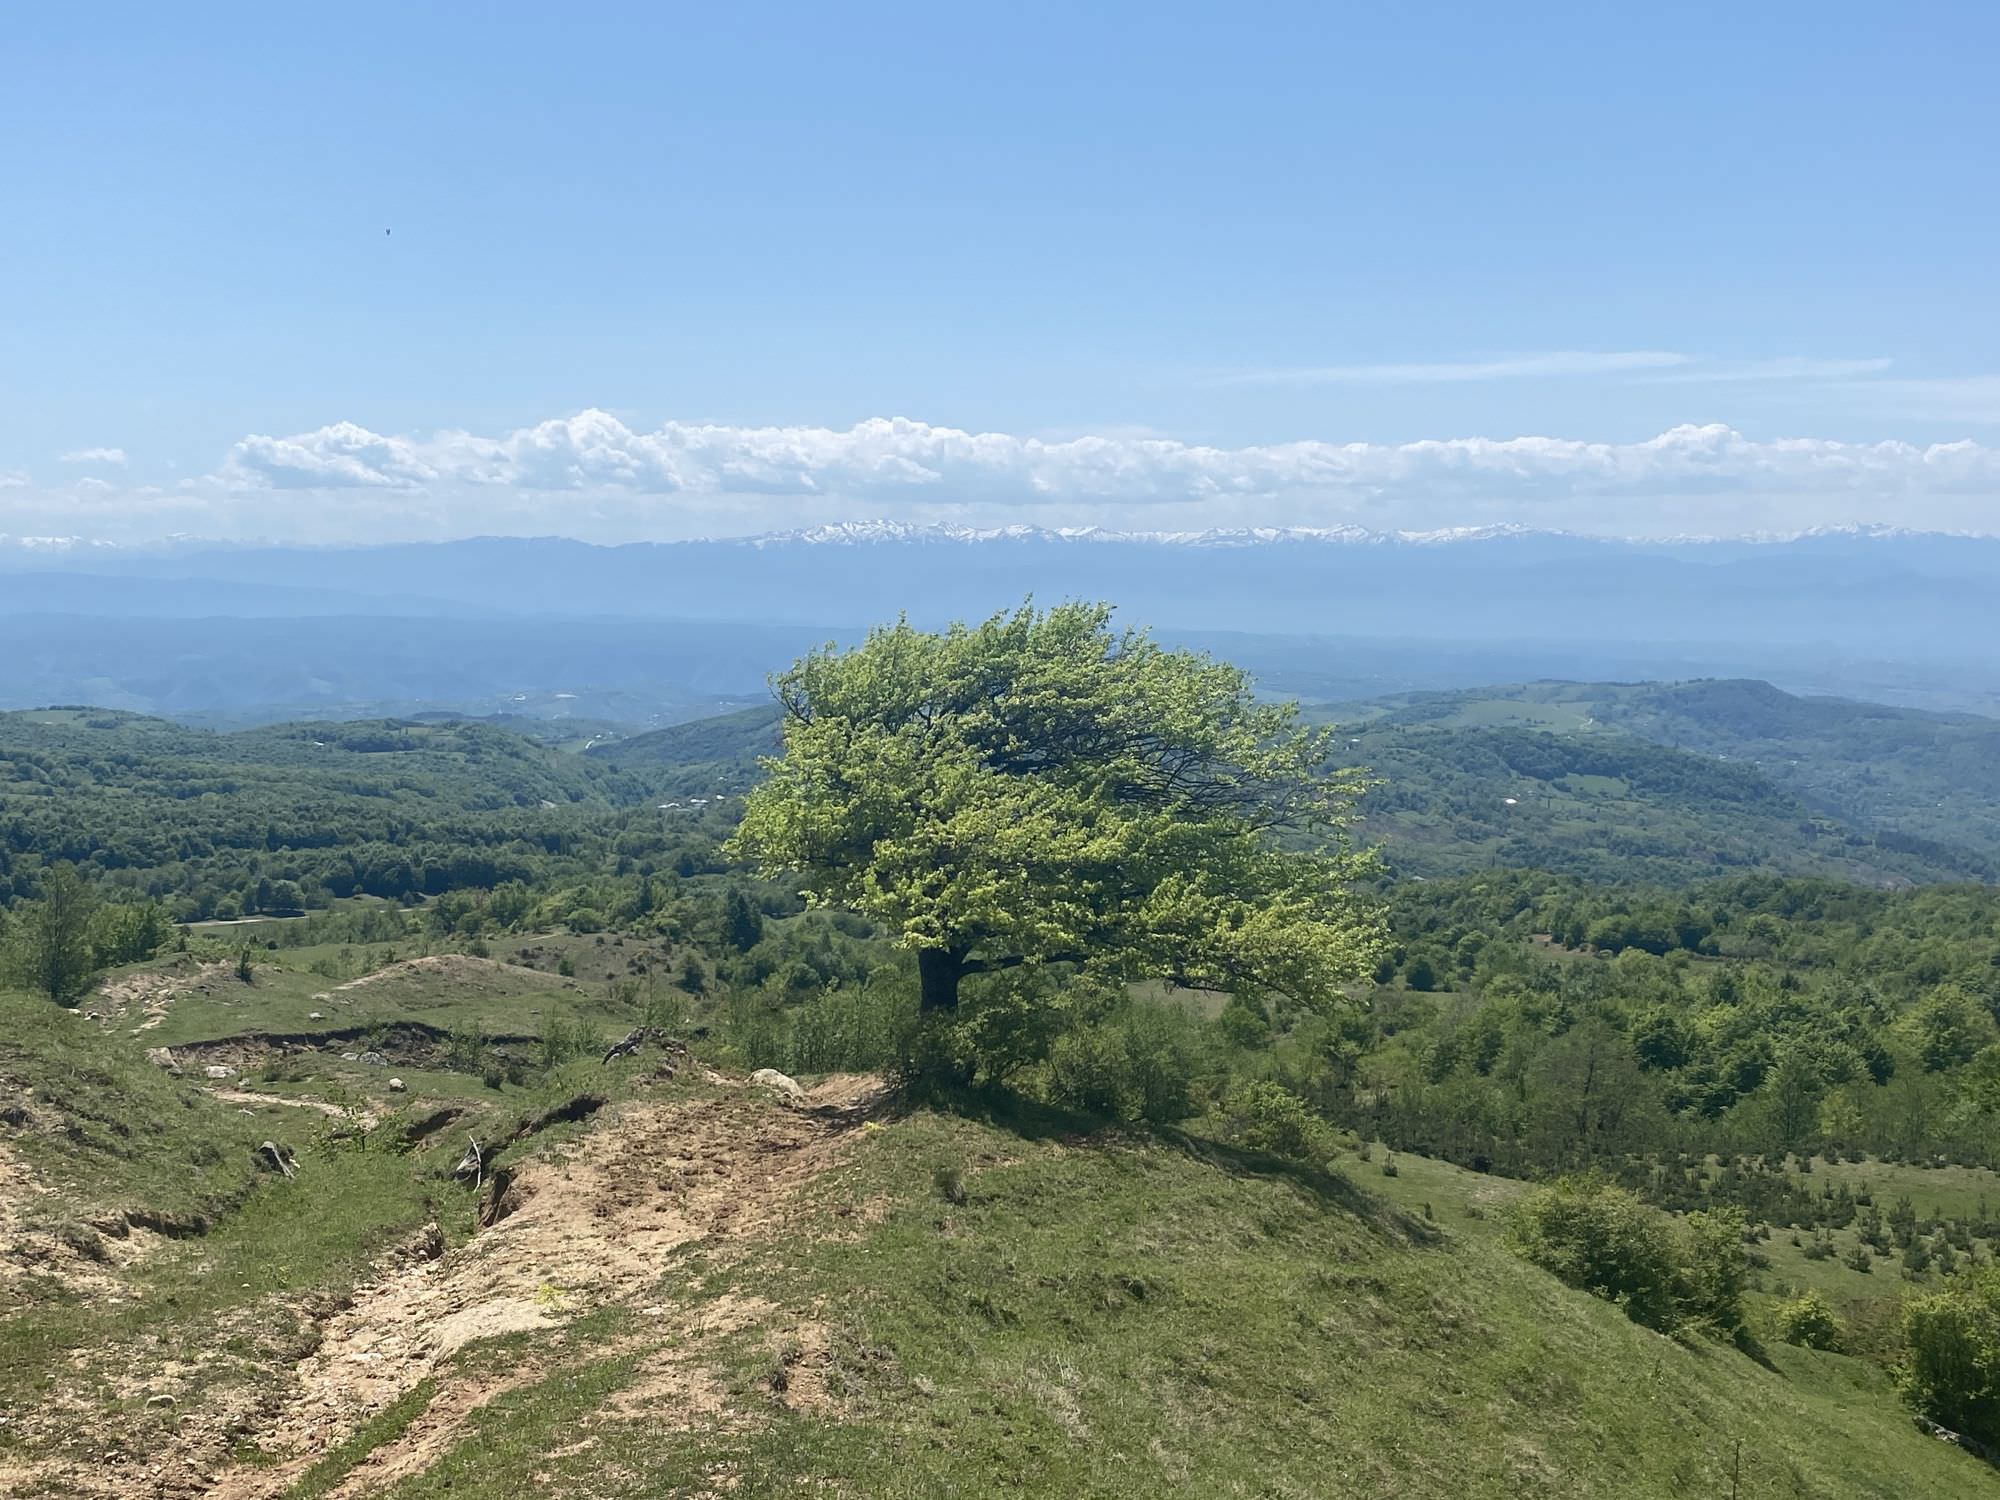
For the last 4,5 km of the hike, return to the main road and take an old, damaged path downwards on the right after some metres. Rather unsuitable for any vehicle these days, it is all fine for walking and allows nice views on the Lesser Caucasus. The lower you get, the more fences and houses you will encounter. Soon you will already enter Khreiti and find yourself on the asphalted road to Chiatura. Alternatively, you can try to find a nice route towards Mukhura or Katskhi; the area around Khreiti also seems to offer some more sights like caves, underground rivers, lakes and castle ruins (information only in Georgian).
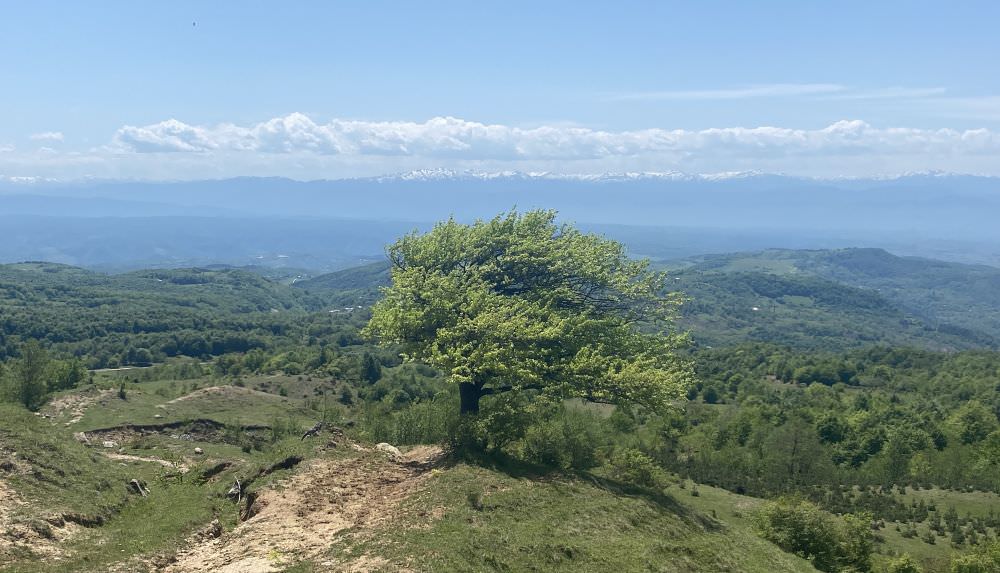
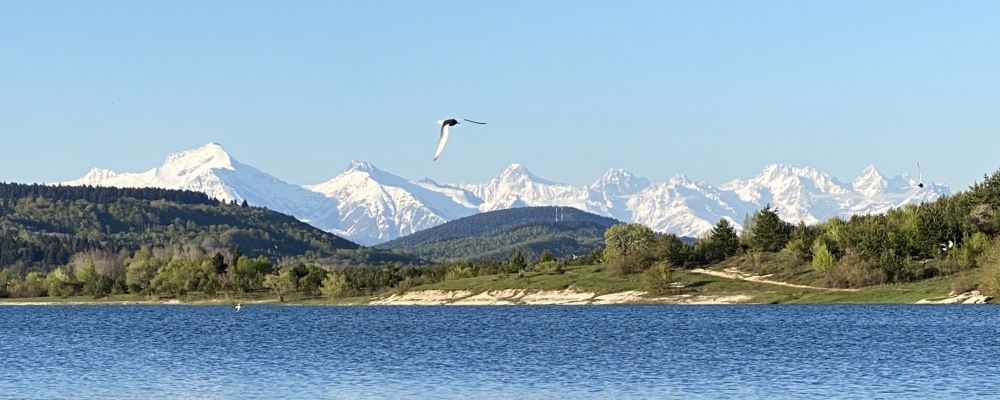
View on the Greater Caucasus
The trail was hiked by Chloé Tremblay and Philipp Bienek, who also provided pictures, gpx and the hike description. Also, one photo was provided by Alex Melanashvili. Thanks a lot!